(V1.06.J168) |
Potato6324 (talk | contribs) m (→Environment) |
||
| (36 intermediate revisions by 13 users not shown) | |||
| Line 1: | Line 1: | ||
| + | <noinclude>{{context push | a+nr }}</noinclude> |
||
== Menus == |
== Menus == |
||
; [[Collection page]] |
; [[Collection page]] |
||
| Line 9: | Line 10: | ||
=== Characters === |
=== Characters === |
||
; General |
; General |
||
| − | * Adjusted the [[ |
+ | * Adjusted the [[stat]]s of each [[character]] in the character selection menu to better reflect their actual in-game stats. |
| − | * Adjusted pickup animation so items no longer obstruct |
+ | * Adjusted pickup animation so items no longer obstruct Isaac's face. |
| − | * |
+ | * Bloodstains on costumes are now consistently the same color. |
; [[Eden]] |
; [[Eden]] |
||
* Holding R to reset will consume an Eden Token and start a new run. |
* Holding R to reset will consume an Eden Token and start a new run. |
||
* Added 30 hairstyles. |
* Added 30 hairstyles. |
||
| − | * Can be |
+ | * Can be randomized if the player has Eden tokens. |
; [[Eve]] |
; [[Eve]] |
||
* Starts with [[Razor Blade]] only if it has been unlocked. |
* Starts with [[Razor Blade]] only if it has been unlocked. |
||
| Line 23: | Line 24: | ||
=== Transformations === |
=== Transformations === |
||
| − | ; [[ |
+ | ; [[Conjoined]] |
* Its costume has color alts. |
* Its costume has color alts. |
||
; [[Seraphim (Transformation)|Seraphim]] |
; [[Seraphim (Transformation)|Seraphim]] |
||
* Its costume has color alts. |
* Its costume has color alts. |
||
| − | ; [[ |
+ | ; [[Spun]] |
* Its costume has color alts. |
* Its costume has color alts. |
||
| − | ; [[ |
+ | ; [[Yes Mother?]] |
* Its costume has color alts. |
* Its costume has color alts. |
||
=== Familiars === |
=== Familiars === |
||
* Teleport to the player's new position if it was changed by a boss such as [[Gurdy]] or [[Mom's Heart]]. |
* Teleport to the player's new position if it was changed by a boss such as [[Gurdy]] or [[Mom's Heart]]. |
||
| − | * Most sources of [[ |
+ | * Most sources of [[Blue Spider]]s throw those spiders out instead of spawning them on the ground. |
* Following [[familiar]]s are no longer pushed back when very close to the player. |
* Following [[familiar]]s are no longer pushed back when very close to the player. |
||
| Line 45: | Line 46: | ||
=== Activated Collectibles === |
=== Activated Collectibles === |
||
| + | ; General |
||
| + | * Some sprites changed: |
||
| + | {| class="wikitable mw-collapsible mw-collapsed" style="text-align:center" |
||
| + | ! Item |
||
| + | ! Old sprite |
||
| + | ! New sprite |
||
| + | |- |
||
| + | | [[The Boomerang]] |
||
| + | | [[file:collectible The Boomerang Rebirth icon.png|96px|link=]] |
||
| + | | [[file:collectible The Boomerang icon.png|96px|link=]] |
||
| + | |- |
||
| + | | [[Box of Spiders]] |
||
| + | | [[file:collectible Box of Spiders Rebirth icon.png|96px|link=]] |
||
| + | | [[file:collectible Box of Spiders icon.png|96px|link=]] |
||
| + | |- |
||
| + | | [[D20]] |
||
| + | | [[file:collectible D20 Rebirth icon.png|96px|link=]] |
||
| + | | [[file:collectible D20 icon.png|96px|link=]] |
||
| + | |- |
||
| + | | [[D7]] |
||
| + | | [[file:collectible D7 Afterbirth icon.png|96px|link=]] |
||
| + | | [[file:collectible D7 icon.png|96px|link=]] |
||
| + | |- |
||
| + | | [[Glass Cannon]] |
||
| + | | [[file:collectible Glass Cannon Afterbirth icon.png|96px|link=]] |
||
| + | | [[file:collectible Glass Cannon icon.png|96px|link=]] |
||
| + | |- |
||
| + | | [[Isaac's Tears]] |
||
| + | | [[file:collectible Isaac's Tears Rebirth icon.png|96px|link=]] |
||
| + | | [[file:collectible Isaac's Tears icon.png|96px|link=]] |
||
| + | |- |
||
| + | | [[The Jar]] |
||
| + | | [[file:collectible The Jar Afterbirth icon.png|96px|link=]] |
||
| + | | [[file:collectible The Jar icon.png|96px|link=]] |
||
| + | |- |
||
| + | | [[Jar of Flies]] |
||
| + | | [[file:collectible Jar of Flies Afterbirth icon.png|96px|link=]] |
||
| + | | [[file:collectible Jar of Flies icon.png|96px|link=]] |
||
| + | |- |
||
| + | | [[Mega Blast]] |
||
| + | | [[file:collectible Mega Blast Afterbirth icon.png|96px|link=]] |
||
| + | | [[file:collectible Mega Blast icon.png|96px|link=]] |
||
| + | |- |
||
| + | | [[Ventricle Razor]] |
||
| + | | [[file:collectible Ventricle Razor Afterbirth icon.png|96px|link=]] |
||
| + | | [[file:collectible Ventricle Razor icon.png|96px|link=]] |
||
| + | |- |
||
| + | | [[We Need to Go Deeper!]] |
||
| + | | [[file:collectible We Need to Go Deeper! Rebirth icon.png|96px|link=]] |
||
| + | | [[file:collectible We Need to Go Deeper! icon.png|96px|link=]] |
||
| + | |} |
||
; {{i|Breath of Life}} |
; {{i|Breath of Life}} |
||
* Can be held down between rooms. |
* Can be held down between rooms. |
||
| Line 52: | Line 104: | ||
; {{i|D4}} |
; {{i|D4}} |
||
* Re-rolls each of Isaac's passive items into a random item from the specific item pool where it was acquired. |
* Re-rolls each of Isaac's passive items into a random item from the specific item pool where it was acquired. |
||
| − | ; {{i|Diplopia |
+ | ; {{i|Diplopia}} |
* No longer spawns extra items for empty item pedestals. |
* No longer spawns extra items for empty item pedestals. |
||
; {{i|Flush!}} |
; {{i|Flush!}} |
||
* [[Poop]]s spawned react to damage similarly to regular poops. |
* [[Poop]]s spawned react to damage similarly to regular poops. |
||
| − | ; {{i|Friendly Ball |
+ | ; {{i|Friendly Ball}} |
* Can catch [[Lil Haunt]]s. |
* Can catch [[Lil Haunt]]s. |
||
| − | ; {{i|Glowing Hour Glass |
+ | ; {{i|Glowing Hour Glass}} |
* Revert the player's [[character]] if it was changed by an item during the current room. |
* Revert the player's [[character]] if it was changed by an item during the current room. |
||
| − | * Rewinds event counters (this includes [[Donation |
+ | * Rewinds event counters (this includes [[Donation Machine|donations]] and [[Eden's Blessing]]s). |
* [[Co-op]] babies are saved and restored. |
* [[Co-op]] babies are saved and restored. |
||
| − | * No longer duplicates [[Blue |
+ | * No longer duplicates [[Blue Fly|Blue Flies]], [[Blue Spider]]s and perma-[[charm]]ed enemies. |
| − | ; {{i|Guppy's Head |
+ | ; {{i|Guppy's Head}} |
* The number of flies is seeded. |
* The number of flies is seeded. |
||
; {{i|Head of Krampus}} |
; {{i|Head of Krampus}} |
||
* Lasers no longer have a chance to rotate. |
* Lasers no longer have a chance to rotate. |
||
| − | ; {{i|Isaac's Tears}} |
||
| − | * Sprite changed. |
||
; {{i|The Jar}} |
; {{i|The Jar}} |
||
* Its sprite changes based on how many hearts it contains. |
* Its sprite changes based on how many hearts it contains. |
||
| − | ; {{i|Jar of Flies |
+ | ; {{i|Jar of Flies}} |
* Its sprite changes based on how many flies it contains. |
* Its sprite changes based on how many flies it contains. |
||
| − | ; {{i|Mine Crafter |
+ | ; {{i|Mine Crafter}} |
* Spawns a [[TNT|TNT barrel]] directly at the player's position rather than on a nearby free tile. |
* Spawns a [[TNT|TNT barrel]] directly at the player's position rather than on a nearby free tile. |
||
; {{i|My Little Unicorn}} |
; {{i|My Little Unicorn}} |
||
| Line 84: | Line 134: | ||
* Damage halved to compensate. |
* Damage halved to compensate. |
||
; {{i|Undefined}} |
; {{i|Undefined}} |
||
| − | * [[The Void]] is reset on exiting the I AM ERROR room |
+ | * [[The Void]] is reset on exiting the I AM ERROR room and can be cleared repeatedly as long as the player is able to gather enough charges to successfully warp to it. |
| − | ; {{i|Ventricle Razor |
+ | ; {{i|Ventricle Razor}} |
* Portals will now appear closed if they have no connected portal. |
* Portals will now appear closed if they have no connected portal. |
||
* Portals got a few minor visual tweaks. |
* Portals got a few minor visual tweaks. |
||
| − | ; {{i|We Need to Go Deeper!}} |
||
| − | * Sprite changed. |
||
=== Passive Collectibles === |
=== Passive Collectibles === |
||
| + | ; General |
||
| − | ; {{i|Abaddon}} |
||
| − | * |
+ | * Some sprites changed: |
| + | {| class="wikitable mw-collapsible mw-collapsed" style="text-align:center" |
||
| − | ; {{i|Anemic}} |
||
| + | ! Item |
||
| − | * Sprite changed. |
||
| + | ! Old sprite |
||
| + | ! New sprite |
||
| + | |- |
||
| + | | [[Less Than Three|<3]] |
||
| + | | [[file:collectible Less Than Three Rebirth icon.png|96px|link=]] |
||
| + | | [[file:collectible Less Than Three icon.png|96px|link=]] |
||
| + | |- |
||
| + | | [[8 Inch Nails]] |
||
| + | | [[file:collectible 8 Inch Nails Afterbirth icon.png|96px|link=]] |
||
| + | | [[file:collectible 8 Inch Nails icon.png|96px|link=]] |
||
| + | |- |
||
| + | | [[Abaddon]] |
||
| + | | [[file:collectible Abaddon Rebirth icon.png|96px|link=]] |
||
| + | | [[file:collectible Abaddon icon.png|96px|link=]] |
||
| + | |- |
||
| + | | [[Anemic]] |
||
| + | | [[file:collectible Anemic Rebirth icon.png|96px|link=]] |
||
| + | | [[file:collectible Anemic icon.png|96px|link=]] |
||
| + | |- |
||
| + | | [[Aquarius]] |
||
| + | | [[file:collectible Aquarius Rebirth icon.png|96px|link=]] |
||
| + | | [[file:collectible Aquarius icon.png|96px|link=]] |
||
| + | |- |
||
| + | | [[The Belt]] |
||
| + | | [[file:collectible The Belt Rebirth icon.png|96px|link=]] |
||
| + | | [[file:collectible The Belt icon.png|96px|link=]] |
||
| + | |- |
||
| + | | [[Best Bud]] |
||
| + | | [[file:collectible Best Bud Rebirth icon.png|96px|link=]] |
||
| + | | [[file:collectible Best Bud icon.png|96px|link=]] |
||
| + | |- |
||
| + | | [[Black Lotus]] |
||
| + | | [[file:collectible Black Lotus Rebirth icon.png|96px|link=]] |
||
| + | | [[file:collectible Black Lotus icon.png|96px|link=]] |
||
| + | |- |
||
| + | | [[Bob's Curse]] |
||
| + | | [[file:collectible Bob's Curse Rebirth icon.png|96px|link=]] |
||
| + | | [[file:collectible Bob's Curse icon.png|96px|link=]] |
||
| + | |- |
||
| + | | [[Box]] |
||
| + | | [[file:collectible Box Rebirth icon.png|96px|link=]] |
||
| + | | [[file:collectible Box icon.png|96px|link=]] |
||
| + | |- |
||
| + | | [[Brimstone]] |
||
| + | | [[file:collectible Brimstone Rebirth icon.png|96px|link=]] |
||
| + | | [[file:collectible Brimstone icon.png|96px|link=]] |
||
| + | |- |
||
| + | | [[Brother Bobby]] |
||
| + | | [[file:collectible Brother Bobby Rebirth icon.png|96px|link=]] |
||
| + | | [[file:collectible Brother Bobby icon.png|96px|link=]] |
||
| + | |- |
||
| + | | [[Bum Friend]] |
||
| + | | [[file:collectible Bum Friend Rebirth icon.png|96px|link=]] |
||
| + | | [[file:collectible Bum Friend icon.png|96px|link=]] |
||
| + | |- |
||
| + | | [[Caffeine Pill]] |
||
| + | | [[file:collectible Caffeine Pill Rebirth icon.png|96px|link=]] |
||
| + | | [[file:collectible Caffeine Pill icon.png|96px|link=]] |
||
| + | |- |
||
| + | | [[Cambion Conception]] |
||
| + | | [[file:collectible Cambion Conception Afterbirth icon.png|96px|link=]] |
||
| + | | [[file:collectible Cambion Conception icon.png|96px|link=]] |
||
| + | |- |
||
| + | | [[Cancer]] |
||
| + | | [[file:collectible Cancer Rebirth icon.png|96px|link=]] |
||
| + | | [[file:collectible Cancer icon.png|96px|link=]] |
||
| + | |- |
||
| + | | [[Celtic Cross]] |
||
| + | | [[file:collectible Celtic Cross Rebirth icon.png|96px|link=]] |
||
| + | | [[file:collectible Celtic Cross icon.png|96px|link=]] |
||
| + | |- |
||
| + | | [[The Compass]] |
||
| + | | [[file:collectible The Compass Rebirth icon.png|96px|link=]] |
||
| + | | [[file:collectible The Compass icon.png|96px|link=]] |
||
| + | |- |
||
| + | | [[Continuum]] |
||
| + | | [[file:collectible Continuum Afterbirth icon.png|96px|link=]] |
||
| + | | [[file:collectible Continuum icon.png|96px|link=]] |
||
| + | |- |
||
| + | | [[Cricket's Head]] |
||
| + | | [[file:collectible Cricket's Head Rebirth icon.png|96px|link=]] |
||
| + | | [[file:collectible Cricket's Head icon.png|96px|link=]] |
||
| + | |- |
||
| + | | [[Crown of Light]] |
||
| + | | [[file:collectible Crown of Light Afterbirth icon.png|96px|link=]] |
||
| + | | [[file:collectible Crown of Light icon.png|96px|link=]] |
||
| + | |- |
||
| + | | [[Cupid's Arrow]] |
||
| + | | [[file:collectible Cupid's Arrow Rebirth icon.png|96px|link=]] |
||
| + | | [[file:collectible Cupid's Arrow icon.png|96px|link=]] |
||
| + | |- |
||
| + | | [[Daddy Longlegs]] |
||
| + | | [[file:collectible Daddy Longlegs Rebirth icon.png|96px|link=]] |
||
| + | | [[file:collectible Daddy Longlegs icon.png|96px|link=]] |
||
| + | |- |
||
| + | | [[Dark Bum]] |
||
| + | | [[file:collectible Dark Bum Rebirth icon.png|96px|link=]] |
||
| + | | [[file:collectible Dark Bum icon.png|96px|link=]] |
||
| + | |- |
||
| + | | [[Demon Baby]] |
||
| + | | [[file:collectible Demon Baby Rebirth icon.png|96px|link=]] |
||
| + | | [[file:collectible Demon Baby icon.png|96px|link=]] |
||
| + | |- |
||
| + | | [[Distant Admiration]] |
||
| + | | [[file:collectible Distant Admiration Rebirth icon.png|96px|link=]] |
||
| + | | [[file:collectible Distant Admiration icon.png|96px|link=]] |
||
| + | |- |
||
| + | | [[Evil Eye]] |
||
| + | | [[file:collectible Evil Eye Afterbirth icon.png|96px|link=]] |
||
| + | | [[file:collectible Evil Eye icon.png|96px|link=]] |
||
| + | |- |
||
| + | | [[Farting Baby]] |
||
| + | | [[file:collectible Farting Baby Afterbirth icon.png|96px|link=]] |
||
| + | | [[file:collectible Farting Baby icon.png|96px|link=]] |
||
| + | |- |
||
| + | | [[Forever Alone]] |
||
| + | | [[file:collectible Forever Alone Rebirth icon.png|96px|link=]] |
||
| + | | [[file:collectible Forever Alone icon.png|96px|link=]] |
||
| + | |- |
||
| + | | [[Friend Zone]] |
||
| + | | [[file:collectible Friend Zone Afterbirth icon.png|96px|link=]] |
||
| + | | [[file:collectible Friend Zone icon.png|96px|link=]] |
||
| + | |- |
||
| + | | [[Gemini (Item)|Gemini]] |
||
| + | | [[file:collectible Gemini Rebirth icon.png|96px|link=]] |
||
| + | | [[file:collectible Gemini icon.png|96px|link=]] |
||
| + | |- |
||
| + | | [[Ghost Baby]] |
||
| + | | [[file:collectible Ghost Baby Rebirth icon.png|96px|link=]] |
||
| + | | [[file:collectible Ghost Baby icon.png|96px|link=]] |
||
| + | |- |
||
| + | | [[Goat Head]] |
||
| + | | [[file:collectible Goat Head Rebirth icon.png|96px|link=]] |
||
| + | | [[file:collectible Goat Head icon.png|96px|link=]] |
||
| + | |- |
||
| + | | [[Guppy's Hair Ball]] |
||
| + | | [[file:collectible Guppy's Hair Ball Rebirth icon.png|96px|link=]] |
||
| + | | [[file:collectible Guppy's Hair Ball icon.png|96px|link=]] |
||
| + | |- |
||
| + | | [[Habit]] |
||
| + | | [[file:collectible Habit Rebirth icon.png|96px|link=]] |
||
| + | | [[file:collectible Habit icon.png|96px|link=]] |
||
| + | |- |
||
| + | | [[Harlequin Baby]] |
||
| + | | [[file:collectible Harlequin Baby Rebirth icon.png|96px|link=]] |
||
| + | | [[file:collectible Harlequin Baby icon.png|96px|link=]] |
||
| + | |- |
||
| + | | [[Holy Water]] |
||
| + | | [[file:collectible Holy Water Rebirth icon.png|96px|link=]] |
||
| + | | [[file:collectible Holy Water icon.png|96px|link=]] |
||
| + | |- |
||
| + | | [[Infestation]] |
||
| + | | [[file:collectible Infestation Rebirth icon.png|96px|link=]] |
||
| + | | [[file:collectible Infestation icon.png|96px|link=]] |
||
| + | |- |
||
| + | | [[Key Bum]] |
||
| + | | [[file:collectible Key Bum Afterbirth icon.png|96px|link=]] |
||
| + | | [[file:collectible Key Bum icon.png|96px|link=]] |
||
| + | |- |
||
| + | | [[Key Piece 2]] |
||
| + | | [[file:collectible Key Piece 2 Rebirth icon.png|96px|link=]] |
||
| + | | [[file:collectible Key Piece 2 icon.png|96px|link=]] |
||
| + | |- |
||
| + | | [[Lil Brimstone]] |
||
| + | | [[file:collectible Lil Brimstone Rebirth icon.png|96px|link=]] |
||
| + | | [[file:collectible Lil Brimstone icon.png|96px|link=]] |
||
| + | |- |
||
| + | | [[Lil' Loki]] |
||
| + | | [[file:collectible Lil' Loki Afterbirth icon.png|96px|link=]] |
||
| + | | [[file:collectible Lil' Loki icon.png|96px|link=]] |
||
| + | |- |
||
| + | | [[Lord of the Pit]] |
||
| + | | [[file:collectible Lord of the Pit Rebirth icon.png|96px|link=]] |
||
| + | | [[file:collectible Lord of the Pit icon.png|96px|link=]] |
||
| + | |- |
||
| + | | [[Lost Fly]] |
||
| + | | [[file:collectible Lost Fly Afterbirth icon.png|96px|link=]] |
||
| + | | [[file:collectible Lost Fly icon.png|96px|link=]] |
||
| + | |- |
||
| + | | [[Lucky Foot]] |
||
| + | | [[file:collectible Lucky Foot Rebirth icon.png|96px|link=]] |
||
| + | | [[file:collectible Lucky Foot icon.png|96px|link=]] |
||
| + | |- |
||
| + | | [[Magic 8 Ball]] |
||
| + | | [[file:collectible Magic 8 Ball Rebirth icon.png|96px|link=]] |
||
| + | | [[file:collectible Magic 8 Ball icon.png|96px|link=]] |
||
| + | |- |
||
| + | | [[Magneto]] |
||
| + | | [[file:collectible Magneto Rebirth icon.png|96px|link=]] |
||
| + | | [[file:collectible Magneto icon.png|96px|link=]] |
||
| + | |- |
||
| + | | [[Mitre]] |
||
| + | | [[file:collectible Mitre Rebirth icon.png|96px|link=]] |
||
| + | | [[file:collectible Mitre icon.png|96px|link=]] |
||
| + | |- |
||
| + | | [[Mom's Contacts]] |
||
| + | | [[file:collectible Mom's Contacts Rebirth icon.png|96px|link=]] |
||
| + | | [[file:collectible Mom's Contacts icon.png|96px|link=]] |
||
| + | |- |
||
| + | | [[Mom's Eye]] |
||
| + | | [[file:collectible Mom's Eye Rebirth icon.png|96px|link=]] |
||
| + | | [[file:collectible Mom's Eye icon.png|96px|link=]] |
||
| + | |- |
||
| + | | [[Mom's Knife]] |
||
| + | | [[file:collectible Mom's Knife Rebirth icon.png|96px|link=]] |
||
| + | | [[file:collectible Mom's Knife icon.png|96px|link=]] |
||
| + | |- |
||
| + | | [[Money = Power]] |
||
| + | | [[file:collectible Money = Power Rebirth icon.png|96px|link=]] |
||
| + | | [[file:collectible Money = Power icon.png|96px|link=]] |
||
| + | |- |
||
| + | | [[The Mulligan]] |
||
| + | | [[file:collectible The Mulligan Rebirth icon.png|96px|link=]] |
||
| + | | [[file:collectible The Mulligan icon.png|96px|link=]] |
||
| + | |- |
||
| + | | [[Multidimensional Baby]] |
||
| + | | [[file:collectible Multidimensional Baby Afterbirth icon.png|96px|link=]] |
||
| + | | [[file:collectible Multidimensional Baby icon.png|96px|link=]] |
||
| + | |- |
||
| + | | [[The Peeper]] |
||
| + | | [[file:collectible The Peeper Rebirth icon.png|96px|link=]] |
||
| + | | [[file:collectible The Peeper icon.png|96px|link=]] |
||
| + | |- |
||
| + | | [[Pentagram]] |
||
| + | | [[file:collectible Pentagram Rebirth icon.png|96px|link=]] |
||
| + | | [[file:collectible Pentagram icon.png|96px|link=]] |
||
| + | |- |
||
| + | | [[Piggy Bank]] |
||
| + | | [[file:collectible Piggy Bank Rebirth icon.png|96px|link=]] |
||
| + | | [[file:collectible Piggy Bank icon.png|96px|link=]] |
||
| + | |- |
||
| + | | [[Polyphemus]] |
||
| + | | [[file:collectible Polyphemus Rebirth icon.png|96px|link=]] |
||
| + | | [[file:collectible Polyphemus icon.png|96px|link=]] |
||
| + | |- |
||
| + | | [[Proptosis]] |
||
| + | | [[file:collectible Proptosis Rebirth icon.png|96px|link=]] |
||
| + | | [[file:collectible Proptosis icon.png|96px|link=]] |
||
| + | |- |
||
| + | | [[Pyro]] |
||
| + | | [[file:collectible Pyro Rebirth icon.png|96px|link=]] |
||
| + | | [[file:collectible Pyro icon.png|96px|link=]] |
||
| + | |- |
||
| + | | [[Rainbow Baby]] |
||
| + | | [[file:collectible Rainbow Baby Rebirth icon.png|96px|link=]] |
||
| + | | [[file:collectible Rainbow Baby icon.png|96px|link=]] |
||
| + | |- |
||
| + | | [[Robo-Baby]] |
||
| + | | [[file:collectible Robo-Baby Rebirth icon.png|96px|link=]] |
||
| + | | [[file:collectible Robo-Baby icon.png|96px|link=]] |
||
| + | |- |
||
| + | | [[Robo-Baby 2.0]] |
||
| + | | [[file:collectible Robo-Baby 2.0 Rebirth icon.png|96px|link=]] |
||
| + | | [[file:collectible Robo-Baby 2.0 icon.png|96px|link=]] |
||
| + | |- |
||
| + | | [[Rotten Baby]] |
||
| + | | [[file:collectible Rotten Baby Rebirth icon.png|96px|link=]] |
||
| + | | [[file:collectible Rotten Baby icon.png|96px|link=]] |
||
| + | |- |
||
| + | | [[Sacrificial Dagger]] |
||
| + | | [[file:collectible Sacrificial Dagger Rebirth icon.png|96px|link=]] |
||
| + | | [[file:collectible Sacrificial Dagger icon.png|96px|link=]] |
||
| + | |- |
||
| + | | [[Sad Bombs]] |
||
| + | | [[file:collectible Sad Bombs Rebirth icon.png|96px|link=]] |
||
| + | | [[file:collectible Sad Bombs icon.png|96px|link=]] |
||
| + | |- |
||
| + | | [[Sagittarius]] |
||
| + | | [[file:collectible Sagittarius Rebirth icon.png|96px|link=]] |
||
| + | | [[file:collectible Sagittarius icon.png|96px|link=]] |
||
| + | |- |
||
| + | | [[Sister Maggy]] |
||
| + | | [[file:collectible Sister Maggy Rebirth icon.png|96px|link=]] |
||
| + | | [[file:collectible Sister Maggy icon.png|96px|link=]] |
||
| + | |- |
||
| + | | [[Skeleton Key]] |
||
| + | | [[file:collectible Skeleton Key Rebirth icon.png|96px|link=]] |
||
| + | | [[file:collectible Skeleton Key icon.png|96px|link=]] |
||
| + | |- |
||
| + | | [[SMB Super Fan]] |
||
| + | | [[file:collectible SMB Super Fan Rebirth icon.png|96px|link=]] |
||
| + | | [[file:collectible SMB Super Fan icon.png|96px|link=]] |
||
| + | |- |
||
| + | | [[Spear of Destiny]] |
||
| + | | [[file:collectible Spear of Destiny Afterbirth icon.png|96px|link=]] |
||
| + | | [[file:collectible Spear of Destiny icon.png|96px|link=]] |
||
| + | |- |
||
| + | | [[Speed Ball]] |
||
| + | | [[file:collectible Speed Ball Rebirth icon.png|96px|link=]] |
||
| + | | [[file:collectible Speed Ball icon.png|96px|link=]] |
||
| + | |- |
||
| + | | [[Spirit of the Night]] |
||
| + | | [[file:collectible Spirit of the Night Rebirth icon.png|96px|link=]] |
||
| + | | [[file:collectible Spirit of the Night icon.png|96px|link=]] |
||
| + | |- |
||
| + | | [[Strange Attractor]] |
||
| + | | [[file:collectible Strange Attractor Rebirth icon.png|96px|link=]] |
||
| + | | [[file:collectible Strange Attractor icon.png|96px|link=]] |
||
| + | |- |
||
| + | | [[Taurus]] |
||
| + | | [[file:collectible Taurus Rebirth icon.png|96px|link=]] |
||
| + | | [[file:collectible Taurus icon.png|96px|link=]] |
||
| + | |- |
||
| + | | [[Tech.5]] |
||
| + | | [[file:collectible Tech.5 Rebirth icon.png|96px|link=]] |
||
| + | | [[file:collectible Tech.5 icon.png|96px|link=]] |
||
| + | |- |
||
| + | | [[Tough Love]] |
||
| + | | [[file:collectible Tough Love Rebirth icon.png|96px|link=]] |
||
| + | | [[file:collectible Tough Love icon.png|96px|link=]] |
||
| + | |- |
||
| + | | [[Whore of Babylon]] |
||
| + | | [[file:collectible Whore of Babylon Rebirth icon.png|96px|link=]] |
||
| + | | [[file:collectible Whore of Babylon icon.png|96px|link=]] |
||
| + | |} |
||
; {{i|Ball of Bandages}} |
; {{i|Ball of Bandages}} |
||
* Decreased the damage rate of level 3 and 4 to match [[Cube of Meat]]. |
* Decreased the damage rate of level 3 and 4 to match [[Cube of Meat]]. |
||
; {{i|The Battery}} |
; {{i|The Battery}} |
||
* Self-recharging active items can charge the yellow meter, allowing Isaac to use them twice immediately. |
* Self-recharging active items can charge the yellow meter, allowing Isaac to use them twice immediately. |
||
| − | ; {{i| |
+ | ; {{i|Betrayal}} |
| + | * No longer triggers if there are fewer than 2 enemies in the room. |
||
| − | * Sprite slightly improved. |
||
| − | ; {{i|Betrayal|n}} |
||
| − | * No longer triggers if there are less than 2 enemies in the room. |
||
* Its costume has color alts. |
* Its costume has color alts. |
||
; {{i|BFFS!}} |
; {{i|BFFS!}} |
||
* Increases spawner familiar spawn rates. |
* Increases spawner familiar spawn rates. |
||
; {{i|Black Candle}} |
; {{i|Black Candle}} |
||
| − | * Makes the darkness from [Curse of Darkness]] fade away instead of immediately lighting the room up. |
+ | * Makes the darkness from [[Curse of Darkness]] fade away instead of immediately lighting the room up. |
| − | ; {{i|Blue Map}} |
||
| − | * Will display the additional [[Secret Room|Secret Room]] granted by [[Fragmented Card]]. |
||
; {{i|The Body}} |
; {{i|The Body}} |
||
* Its costume has color alts. |
* Its costume has color alts. |
||
; {{i|Bogo Bombs}} |
; {{i|Bogo Bombs}} |
||
* Its costume has color alts. |
* Its costume has color alts. |
||
| − | ; {{i|Bursting Sack |
+ | ; {{i|Bursting Sack}} |
* Its costume has color alts. |
* Its costume has color alts. |
||
| − | ; {{i|Caffeine Pill}} |
||
| − | * Sprite changed. |
||
| − | ; {{i|Cambion Conception|n}} |
||
| − | * The effect of [[Dull Razor]] counts towards the Cambion Conception payout allowing familiars to be spawned without taking real damage. |
||
; {{i|Cancer}} |
; {{i|Cancer}} |
||
* Its costume has color alts. |
* Its costume has color alts. |
||
| − | ; {{i| |
+ | ; {{i|Dead Eye}} |
| − | * Sprite changed. |
||
| − | ; {{i|Dead Cat}} |
||
| − | * This item counts as 9 items, so if the player is game on trying for an early portal to [[The Void]] after beating [[Mom]], this will significantly boost the progress closer to 20 items. |
||
| − | ; {{i|Dead Eye|n}} |
||
* The multiplier will no longer be lost when hitting poops or TNT barrels. |
* The multiplier will no longer be lost when hitting poops or TNT barrels. |
||
| − | ; {{i|Distant Admiration}} |
||
| − | * Sprite changed. |
||
; {{i|E Coli}} |
; {{i|E Coli}} |
||
* [[Poop]]s spawned react to damage similarly to regular poops. |
* [[Poop]]s spawned react to damage similarly to regular poops. |
||
; {{i|Eden's Blessing}} |
; {{i|Eden's Blessing}} |
||
* Is now limited to a maximum of 10 to prevent potential crashes. |
* Is now limited to a maximum of 10 to prevent potential crashes. |
||
| − | ; {{i|Epiphora |
+ | ; {{i|Epiphora}} |
* Being hit, changing rooms, and using items no longer reset the Epiphora bonus. |
* Being hit, changing rooms, and using items no longer reset the Epiphora bonus. |
||
** During the delay when transitioning between rooms, picking up an item, or using an active item, it's possible to change firing direction without resetting the bonus. |
** During the delay when transitioning between rooms, picking up an item, or using an active item, it's possible to change firing direction without resetting the bonus. |
||
| − | ; {{i|Farting Baby|n}} |
||
| − | * Its sprite matches its familiar sprite. |
||
; {{i|Fate}} |
; {{i|Fate}} |
||
* Its costume has color alts. |
* Its costume has color alts. |
||
| − | ; {{i| |
+ | ; {{i|Fruit Cake}} |
| − | * Sprite changed. |
||
| − | ; {{i|Fruit Cake|n}} |
||
* New possible effects: |
* New possible effects: |
||
** [[Compound Fracture]] |
** [[Compound Fracture]] |
||
| Line 166: | Line 511: | ||
* Its costume has color alts. |
* Its costume has color alts. |
||
; {{i|Key Piece 1}} / {{i|Key Piece 2}} |
; {{i|Key Piece 1}} / {{i|Key Piece 2}} |
||
| − | * Will drop from angels that are not in [[ |
+ | * Will drop from angels that are not in [[Angel Room]]s. |
| − | ; {{i|Kidney Stone |
+ | ; {{i|Kidney Stone}} |
* Causes Isaac to fire "tears" from the middle instead of from his eyes, and at a slightly lower height. |
* Causes Isaac to fire "tears" from the middle instead of from his eyes, and at a slightly lower height. |
||
; {{i|Lil Brimstone}} |
; {{i|Lil Brimstone}} |
||
* Got renamed from "Lil' Brimstone" to "Lil Brimstone". |
* Got renamed from "Lil' Brimstone" to "Lil Brimstone". |
||
| − | * Can damage [[ |
+ | * Can damage [[Fire Place]]s and [[poop]]s. |
; {{i|Lil Haunt}} |
; {{i|Lil Haunt}} |
||
* Got renamed from "Lil' Haunt" to "Lil Haunt". |
* Got renamed from "Lil' Haunt" to "Lil Haunt". |
||
| Line 178: | Line 523: | ||
; {{i|Lost Contact}} |
; {{i|Lost Contact}} |
||
* Only affects the player and [[Incubus]]'s tears. |
* Only affects the player and [[Incubus]]'s tears. |
||
| − | ; {{i|Lusty Blood |
+ | ; {{i|Lusty Blood}} |
* Its costume has color alts. |
* Its costume has color alts. |
||
| − | ; {{i|Mom's Contacts}} |
||
| − | * Sprite changed. |
||
| − | ; {{i|Mom's Eye}} |
||
| − | * Sprite changed. |
||
| − | ; {{i|Money Power}} |
||
| − | * Sprite changed. |
||
; {{i|Number One}} |
; {{i|Number One}} |
||
* Causes Isaac to fire "tears" from the middle instead of from his eyes, and at a slightly lower height. |
* Causes Isaac to fire "tears" from the middle instead of from his eyes, and at a slightly lower height. |
||
; {{i|Ouija Board}} |
; {{i|Ouija Board}} |
||
* Its costume no longer overwrites the player's skin color to pink instead of white. |
* Its costume no longer overwrites the player's skin color to pink instead of white. |
||
| − | ; {{i|The Peeper}} |
||
| − | * Sprite changed. |
||
| − | ; {{i|Pentagram}} |
||
| − | * Sprite changed. |
||
; {{i|PHD}} |
; {{i|PHD}} |
||
* Converts: |
* Converts: |
||
| Line 204: | Line 539: | ||
; {{i|Piggy Bank}} |
; {{i|Piggy Bank}} |
||
* Its costume has color alts. |
* Its costume has color alts. |
||
| − | ; {{i| |
+ | ; {{i|Purity}} |
| + | * Better visualization of Purity's glow. |
||
| − | * Sprite changed. |
||
| − | ; {{i| |
+ | ; {{i|Restock}} |
| − | * Sprite changed. |
||
| − | ; {{i|Purity|n}} |
||
| − | * Better visualisation of Purity's glow. |
||
| − | ; {{i|Restock|n}} |
||
* Purchasing an item that is on sale will replace it with another that is on sale. |
* Purchasing an item that is on sale will replace it with another that is on sale. |
||
; {{i|Robo-Baby}} |
; {{i|Robo-Baby}} |
||
| − | * Can damage [[ |
+ | * Can damage [[Fire Place]]s and [[poop]]s. |
; {{i|Rubber Cement}} |
; {{i|Rubber Cement}} |
||
* Tears bounce off bombs. |
* Tears bounce off bombs. |
||
| Line 219: | Line 550: | ||
; {{i|Sagittarius}} |
; {{i|Sagittarius}} |
||
* Its costume has color alts. |
* Its costume has color alts. |
||
| − | ; {{i|Scatter Bombs |
+ | ; {{i|Scatter Bombs}} |
* Bombs actually scatter around. |
* Bombs actually scatter around. |
||
* Small bombs leave smaller craters. |
* Small bombs leave smaller craters. |
||
; {{i|The Small Rock}} |
; {{i|The Small Rock}} |
||
* The speed and tears changes will take effect immediately. Without Afterbirth+, they didn't immediately change until Isaac's speed or tears stats are updated the next time. |
* The speed and tears changes will take effect immediately. Without Afterbirth+, they didn't immediately change until Isaac's speed or tears stats are updated the next time. |
||
| − | ; {{i|SMB Super Fan}} |
||
| − | * Sprite changed. |
||
; {{i|Steam Sale}} |
; {{i|Steam Sale}} |
||
* Items have a chance to be discounted further by random sales; for example, a discounted item originally costing 5 coins will then cost 2 coins instead of 3. |
* Items have a chance to be discounted further by random sales; for example, a discounted item originally costing 5 coins will then cost 2 coins instead of 3. |
||
| − | ; {{i|Sticky Bombs |
+ | ; {{i|Sticky Bombs}} |
* Its costume has color alts. |
* Its costume has color alts. |
||
| − | ; {{i|Succubus |
+ | ; {{i|Succubus}} |
* Grants its damage bonus when obtained via [[Cambion Conception]]. |
* Grants its damage bonus when obtained via [[Cambion Conception]]. |
||
; {{i|Synthoil}} |
; {{i|Synthoil}} |
||
| Line 236: | Line 565: | ||
=== Trinkets === |
=== Trinkets === |
||
| + | ; General |
||
| − | ; {{i|Cain's Eye}} |
||
| − | * |
+ | * Some sprites changed: |
| + | {| class="wikitable mw-collapsible mw-collapsed" style="text-align:center" |
||
| − | ; {{i|Endless Nameless|n}} |
||
| + | ! Item |
||
| − | * Sprite changed. |
||
| + | ! Old sprite |
||
| − | ; {{i|Karma|n}} |
||
| + | ! New sprite |
||
| − | * Sprite changed. |
||
| + | |- |
||
| − | ; {{i|Lazy Worm|n}} |
||
| + | | [[???'s Soul]] |
||
| − | * Sprite changed. |
||
| + | | [[File:Blue Baby's Soul Rebirth Icon.png|96px|link=]] |
||
| − | ; {{i|The Left Hand}} |
||
| + | | [[File:Blue Baby's Soul Icon.png|96px|link=]] |
||
| − | * Affects [[stone chest]]s. |
||
| + | |- |
||
| − | ; {{i|Mom's Pearl}} |
||
| + | | [[Black Feather]] |
||
| − | * Sprite changed. |
||
| + | | [[File:Black Feather Afterbirth Icon.png|96px|link=]] |
||
| − | ; {{i|NO!|n}} |
||
| + | | [[File:Black Feather Icon.png|96px|link=]] |
||
| − | * Sprite changed. |
||
| + | |- |
||
| − | ; {{i|Safety Scissors|n}} |
||
| + | | [[Blasting Cap]] |
||
| + | | [[File:Blasting Cap Afterbirth Icon.png|96px|link=]] |
||
| + | | [[File:Blasting Cap Icon.png|96px|link=]] |
||
| + | |- |
||
| + | | [[Blister]] |
||
| + | | [[File:Blister Afterbirth Icon.png|96px|link=]] |
||
| + | | [[File:Blister Icon.png|96px|link=]] |
||
| + | |- |
||
| + | | [[Bob's Bladder]] |
||
| + | | [[File:Bob's Bladder Afterbirth Icon.png|96px|link=]] |
||
| + | | [[File:Bob's Bladder Icon.png|96px|link=]] |
||
| + | |- |
||
| + | | [[Broken Magnet]] |
||
| + | | [[File:Broken Magnet Rebirth Icon.png|96px|link=]] |
||
| + | | [[File:Broken Magnet Icon.png|96px|link=]] |
||
| + | |- |
||
| + | | [[Brown Cap]] |
||
| + | | [[File:Brown Cap Afterbirth Icon.png|96px|link=]] |
||
| + | | [[File:Brown Cap Icon.png|96px|link=]] |
||
| + | |- |
||
| + | | [[Cain's Eye]] |
||
| + | | [[File:Cain's Eye Rebirth.png|96px|link=]] |
||
| + | | [[File:Cain's Eye Icon.png|96px|link=]] |
||
| + | |- |
||
| + | | [[Cracked Dice]] |
||
| + | | [[File:Cracked Dice Afterbirth Icon.png|96px|link=]] |
||
| + | | [[File:Cracked Dice Icon.png|96px|link=]] |
||
| + | |- |
||
| + | | [[Daemon's Tail]] |
||
| + | | [[File:Daemon's Tail Rebirth Icon.png|96px|link=]] |
||
| + | | [[File:Daemon's Tail Icon.png|96px|link=]] |
||
| + | |- |
||
| + | | [[Endless Nameless]] |
||
| + | | [[File:Endless Nameless Afterbirth Icon.png|96px|link=]] |
||
| + | | [[File:Endless Nameless Icon.png|96px|link=]] |
||
| + | |- |
||
| + | | [[Error]] |
||
| + | | [[File:Error Afterbirth Icon.png|96px|link=]] |
||
| + | | [[File:Error Icon.png|96px|link=]] |
||
| + | |- |
||
| + | | [[Karma]] |
||
| + | | [[File:Karma Afterbirth Icon.png|96px|link=]] |
||
| + | | [[File:Karma Icon.png|96px|link=]] |
||
| + | |- |
||
| + | | [[Lazy Worm]] |
||
| + | | [[File:Lazy Worm Afterbirth Icon.png|96px|link=]] |
||
| + | | [[File:Lazy Worm Icon.png|96px|link=]] |
||
| + | |- |
||
| + | | [[Lil Larva]] |
||
| + | | [[File:Lil Larva Afterbirth Icon.png|96px|link=]] |
||
| + | | [[File:Lil Larva Icon.png|96px|link=]] |
||
| + | |- |
||
| + | | [[Louse]] |
||
| + | | [[File:Louse Afterbirth Icon.png|96px|link=]] |
||
| + | | [[File:Louse Icon.png|96px|link=]] |
||
| + | |- |
||
| + | | [[Lucky Rock]] |
||
| + | | [[File:Lucky Rock Rebirth Icon.png|96px|link=]] |
||
| + | | [[File:Lucky Rock Icon.png|96px|link=]] |
||
| + | |- |
||
| + | | [[Mom's Locket]] |
||
| + | | [[File:Mom's Locket Afterbirth Icon.png|96px|link=]] |
||
| + | | [[File:Mom's Locket Icon.png|96px|link=]] |
||
| + | |- |
||
| + | | [[Mom's Pearl]] |
||
| + | | [[File:Mom's Pearl Rebirth Icon.png|96px|link=]] |
||
| + | | [[File:Mom's Pearl Icon.png|96px|link=]] |
||
| + | |- |
||
| + | | [[Mysterious Paper]] |
||
| + | | [[File:Mysterious Paper Rebirth Icon.png|96px|link=]] |
||
| + | | [[File:Mysterious Paper Icon.png|96px|link=]] |
||
| + | |- |
||
| + | | [[NO!]] |
||
| + | | [[File:NO! Afterbirth Icon.png|96px|link=]] |
||
| + | | [[File:NO! Icon.png|96px|link=]] |
||
| + | |- |
||
| + | | [[Poker Chip]] |
||
| + | | [[File:Poker Chip Afterbirth Icon.png|96px|link=]] |
||
| + | | [[File:Poker Chip Icon.png|96px|link=]] |
||
| + | |- |
||
| + | | [[Purple Heart]] |
||
| + | | [[File:Purple Heart Rebirth Icon.png|96px|link=]] |
||
| + | | [[File:Purple Heart Icon.png|96px|link=]] |
||
| + | |- |
||
| + | | [[Push Pin]] |
||
| + | | [[File:Push Pin Rebirth Icon.png|96px|link=]] |
||
| + | | [[File:Push Pin Icon.png|96px|link=]] |
||
| + | |- |
||
| + | | [[Rainbow Worm]] |
||
| + | | [[File:Rainbow Worm Afterbirth Icon.png|96px|link=]] |
||
| + | | [[File:Rainbow Worm Icon.png|96px|link=]] |
||
| + | |- |
||
| + | | [[Rib of Greed]] |
||
| + | | [[File:Rib of Greed Afterbirth Icon.png|96px|link=]] |
||
| + | | [[File:Rib of Greed Icon.png|96px|link=]] |
||
| + | |- |
||
| + | | [[Second Hand]] |
||
| + | | [[File:Second Hand Afterbirth Icon.png|96px|link=]] |
||
| + | | [[File:Second Hand Icon.png|96px|link=]] |
||
| + | |- |
||
| + | | [[Shiny Rock]] |
||
| + | | [[File:Shiny Rock Afterbirth Icon.png|96px|link=]] |
||
| + | | [[File:Shiny Rock Icon.png|96px|link=]] |
||
| + | |- |
||
| + | | [[Stud Finder]] |
||
| + | | [[File:Stud Finder Afterbirth Icon.png|96px|link=]] |
||
| + | | [[File:Stud Finder Icon.png|96px|link=]] |
||
| + | |- |
||
| + | | [[Super Magnet]] |
||
| + | | [[File:Super Magnet Afterbirth Icon.png|96px|link=]] |
||
| + | | [[File:Super Magnet Icon.png|96px|link=]] |
||
| + | |- |
||
| + | | [[Tape Worm]] |
||
| + | | [[File:Tape Worm Afterbirth Icon.png|96px|link=]] |
||
| + | | [[File:Tape Worm Icon.png|96px|link=]] |
||
| + | |- |
||
| + | | [[Umbilical Cord]] |
||
| + | | [[File:Umbilical Cord Rebirth Icon.png|96px|link=]] |
||
| + | | [[File:Umbilical Cord Icon.png|96px|link=]] |
||
| + | |- |
||
| + | | [[Watch Battery]] |
||
| + | | [[File:Watch Battery Afterbirth Icon.png|96px|link=]] |
||
| + | | [[File:Watch Battery Icon.png|96px|link=]] |
||
| + | |- |
||
| + | | [[Whip Worm]] |
||
| + | | [[File:Whip Worm Rebirth Icon.png|96px|link=]] |
||
| + | | [[File:Whip Worm Icon.png|96px|link=]] |
||
| + | |} |
||
| + | ; {{t|The Left Hand}} |
||
| + | * Affects [[Bomb Chest]]s. |
||
| + | ; {{t|Safety Scissors}} |
||
* [[Wrath]] and [[Super Wrath]]'s bombs turn into their respective pickups. |
* [[Wrath]] and [[Super Wrath]]'s bombs turn into their respective pickups. |
||
| − | ; {{ |
+ | ; {{t|Tick}} |
| + | * Can be removed by [[Smelter]] and [[Gulp!]]. |
||
| − | * Sprite changed. |
||
| − | ; {{i|Tick}} |
||
| − | * Can be removed by [[Smelter]] and [[Pills|Gulp!]]. |
||
=== Interactions === |
=== Interactions === |
||
| + | * {{p|? Card}} + {{i|Glowing Hour Glass}} - The ? Card doesn't get refunded upon usage anymore. |
||
| − | <!--{{scroll box | height = 400px | content =--> |
||
| − | * {{i|? Card}} + {{i|Glowing Hour Glass|n}} - The ? Card doesn't get refunded upon usage anymore. |
||
* {{i|9 Volt}} + {{i|The Candle}} - The Candle starts at half charge after use. |
* {{i|9 Volt}} + {{i|The Candle}} - The Candle starts at half charge after use. |
||
| − | * {{i|A Lump of Coal}} + {{i|Athame |
+ | * {{i|A Lump of Coal}} + {{i|Athame}} - Damage to the ring of Athame is no longer reduced by half. |
| − | * {{i|A Lump of Coal}} + {{i|Maw of the Void |
+ | * {{i|A Lump of Coal}} + {{i|Maw of the Void}} - Damage to the Maw ring is no longer reduced by half. |
| − | * {{i|Athame |
+ | * {{i|Athame}} + {{i|Proptosis}} - The ring deals normal damage. |
* {{i|Brimstone}} + {{i|Ipecac}} - Isaac shoots Ipecac tears while charging Brimstone. Isaac gains increased damage, decreased tears, and the poison effect. |
* {{i|Brimstone}} + {{i|Ipecac}} - Isaac shoots Ipecac tears while charging Brimstone. Isaac gains increased damage, decreased tears, and the poison effect. |
||
| − | * {{i|Car Battery |
+ | * {{i|Car Battery}} + {{i|Mine Crafter}} - Spawns two [[TNT|TNT barrels]]. |
| − | * {{i|Cursed Eye}} + {{i|Incubus |
+ | * {{i|Cursed Eye}} + {{i|Incubus}} - A burst of tears is fired, but it does not need to be charged. |
* {{i|Epic Fetus}} + {{i|Monstro's Lung}} - As of current version this synergy is bugged and only a single missile fires. |
* {{i|Epic Fetus}} + {{i|Monstro's Lung}} - As of current version this synergy is bugged and only a single missile fires. |
||
* {{i|Ipecac}} + {{i|The Ludovico Technique}} - +4 damage bonus, no explosion. |
* {{i|Ipecac}} + {{i|The Ludovico Technique}} - +4 damage bonus, no explosion. |
||
* {{i|Ipecac}} + {{i|Mom's Knife}} - Also adds +4 damage. |
* {{i|Ipecac}} + {{i|Mom's Knife}} - Also adds +4 damage. |
||
| − | * {{i|The Ludovico Technique}} + {{i|Multidimensional Baby |
+ | * {{i|The Ludovico Technique}} + {{i|Multidimensional Baby}} - An additional Ludovico tear is spawned when it passes through Multidimensional Baby, at the start of every room, and persists like the Ludovico tear itself. |
| − | * {{i|Maw of the Void |
+ | * {{i|Maw of the Void}} + {{i|Proptosis}} - The ring deals normal damage. |
| − | <!--}}--> |
||
== Pickups == |
== Pickups == |
||
; General |
; General |
||
* Can be picked up as soon as they hit the ground. |
* Can be picked up as soon as they hit the ground. |
||
| − | * Pickup velocities are seeded from [[machine]]s, [[beggar]]s, [[ |
+ | * Pickup velocities are seeded from [[machine]]s, [[beggar]]s, [[Tinted Rock]]s, [[chest]]s, [[sack]]s, and [[boss]]es. |
=== Hearts === |
=== Hearts === |
||
| − | ; [[Black |
+ | ; [[Black Heart]] |
* Has unique sounds. |
* Has unique sounds. |
||
| − | ; [[Eternal |
+ | ; [[Eternal Heart]] |
| − | * Takes half a heart worth of damage from any lethal hit taken with only [[ |
+ | * Takes half a heart worth of damage from any lethal hit taken with only [[Soul Heart]]s. |
| − | ; [[Gold |
+ | ; [[Gold Heart]] |
* Turns nearby enemies to gold when breaking. |
* Turns nearby enemies to gold when breaking. |
||
* Added better visual feedback when breaking. |
* Added better visual feedback when breaking. |
||
* Minimap icon added. |
* Minimap icon added. |
||
* Has unique sounds. |
* Has unique sounds. |
||
| − | ; [[Half |
+ | ; [[Half Red Heart]] |
| − | * Minimap icon added. |
||
| − | ; [[Half soul heart]] |
||
* Minimap icon added. |
* Minimap icon added. |
||
=== Coins === |
=== Coins === |
||
| − | ; [[Lucky |
+ | ; [[Lucky Penny]] |
* Has a green shine. |
* Has a green shine. |
||
=== Bombs === |
=== Bombs === |
||
| − | ; [[ |
+ | ; [[Golden Bomb]] |
* Has unique sounds. |
* Has unique sounds. |
||
| Line 307: | Line 761: | ||
=== Cards and Runes === |
=== Cards and Runes === |
||
| − | ; {{ |
+ | ; {{p|? Card}} |
* Its card ID is 48 instead of 43. |
* Its card ID is 48 instead of 43. |
||
| − | ; {{ |
+ | ; {{p|A Card Against Humanity}} |
| − | * Has a unique card back. |
||
| − | ; {{i|Chaos Card}} |
||
* Has a unique card back. |
* Has a unique card back. |
||
| − | ; {{ |
+ | ; {{p|Chaos Card}} |
* Has a unique card back. |
* Has a unique card back. |
||
| − | ; {{ |
+ | ; {{p|Credit Card}} |
* Has a unique card back. |
* Has a unique card back. |
||
| − | ; {{ |
+ | ; {{p|Get out of Jail Free Card}} |
* Has a unique card back. |
* Has a unique card back. |
||
| Line 323: | Line 775: | ||
; General |
; General |
||
* Items dropped no longer revert to their generic stone pedestal look upon leaving and reentering the room. |
* Items dropped no longer revert to their generic stone pedestal look upon leaving and reentering the room. |
||
| − | ; [[ |
+ | ; [[Locked Chest]] |
* The Golden Chest pool also includes bags, such as [[IV Bag]] or [[Sack of Pennies]]. |
* The Golden Chest pool also includes bags, such as [[IV Bag]] or [[Sack of Pennies]]. |
||
| − | ; [[ |
+ | ; [[Spiked Chest]] |
| − | * |
+ | * Spiked Chests will deal damage normally even in [[The Chest]] / [[Dark Room]]. |
== Entities == |
== Entities == |
||
| Line 332: | Line 784: | ||
; General |
; General |
||
* [[Champion]] enemies no longer deal contact damage if the non-champion version doesn't. |
* [[Champion]] enemies no longer deal contact damage if the non-champion version doesn't. |
||
| − | * [[Charm]]ed enemies prioritize non |
+ | * [[Charm]]ed enemies prioritize non-charmed enemies unless there aren't any. |
* Permanently [[charm]]ed enemies no longer try to go after [[Punching Bag]]. |
* Permanently [[charm]]ed enemies no longer try to go after [[Punching Bag]]. |
||
| − | * Permanently [[charm]]ed enemies |
+ | * Permanently [[charm]]ed enemies can shoot projectiles through each other and familiars. |
* Monster replacements will now only occur with enemies spawned as part of the room layout. |
* Monster replacements will now only occur with enemies spawned as part of the room layout. |
||
; [[Begotten]] |
; [[Begotten]] |
||
| Line 342: | Line 794: | ||
; [[Blue Gaper]] |
; [[Blue Gaper]] |
||
* Reduced Base HP and added stage HP. |
* Reduced Base HP and added stage HP. |
||
| − | * Has a proper |
+ | * Has a proper appearance animation if spawned by a room rather than by a boss. |
; [[Conjoined Fatty]] |
; [[Conjoined Fatty]] |
||
* Added extra sounds and effects to [[creep]] attacks. |
* Added extra sounds and effects to [[creep]] attacks. |
||
; [[Death's Head]] |
; [[Death's Head]] |
||
* No longer deals contact damage during its death animation. |
* No longer deals contact damage during its death animation. |
||
| − | ; [[Dank Squirt]] |
||
| − | * Can be spawned if [[Delirium]] turns into [[Brownie]] at low health and dies. Killing them will count as killing Delirium. |
||
| − | ; [[Drowned Hive]] |
||
| − | * When he is a [[Champion|pulsing red champion]], every enemy he spawns will be invincible until Isaac kills it. |
||
; [[Greed Gaper]] |
; [[Greed Gaper]] |
||
| − | * Has a proper |
+ | * Has a proper appearance animation if spawned by a room rather than by a boss. |
| − | ; [[Hive]] |
||
| − | * When he is a [[Champion|pulsing red champion]], every enemy he spawns will be invincible until Isaac kills it. |
||
; [[Homunculus]] |
; [[Homunculus]] |
||
* Is chained to an adjacent rock if the nearest wall is more than 1 grid cell away. |
* Is chained to an adjacent rock if the nearest wall is more than 1 grid cell away. |
||
; [[Lil Haunt]] |
; [[Lil Haunt]] |
||
| − | * Is no longer considered boss. |
+ | * Is no longer considered a boss. |
* Has a unique death portrait. |
* Has a unique death portrait. |
||
; [[Lump]] |
; [[Lump]] |
||
| Line 366: | Line 812: | ||
; [[Mega Clotty]] |
; [[Mega Clotty]] |
||
* Make a sound when stomping. |
* Make a sound when stomping. |
||
| − | ; [[Nest]] |
||
| − | * Can spawn [[Ministro]]s on death. |
||
| − | * When he is a [[Champion|pulsing red champion]], every enemy he spawns will be invincible until Isaac kills it. |
||
| − | ; [[Oob]] |
||
| − | * Can spawn [[Poison Mind]]s instead of regular [[Brain]]s. |
||
; [[Rage Creep]] |
; [[Rage Creep]] |
||
| − | * Its brimstone is no longer moved upwards and no longer |
+ | * Its brimstone is no longer moved upwards and no longer causes the player to take damage along the top wall in Womb/Utero room #202. |
* Its attack animation slightly longer. |
* Its attack animation slightly longer. |
||
; [[Spider]] |
; [[Spider]] |
||
| Line 397: | Line 838: | ||
; [[Brownie]] |
; [[Brownie]] |
||
* Has new a champion version: |
* Has new a champion version: |
||
| − | ** Black: Spawns up to 3 [[Maggot]]s at once instead of [[Corn]]s. Upon death, spawns 2 [[Dank Squirt]]s. |
+ | ** Black: Spawns up to 3 [[Maggot#Charger|Charger]]s at once instead of [[Corn]]s. Upon death, spawns 2 [[Dank Squirt]]s. |
; [[The Cage]] |
; [[The Cage]] |
||
* Its grey creep blinks. |
* Its grey creep blinks. |
||
| − | ; [[The Duke of Flies]] |
||
| − | * The [[Large Attack Fly|Large Attack Flies]] orbit around him when coughed up instead of homing in on Isaac. |
||
; [[The Forsaken]] |
; [[The Forsaken]] |
||
| − | * Moves to a more appropriate place to perform his Brimstone attack in L |
+ | * Moves to a more appropriate place to perform his Brimstone attack in L-shaped rooms. |
| − | * Multiple [[Forsaken]]s in the same room |
+ | * Multiple [[Forsaken]]s in the same room can spawn their own [[Bony]] each and always spin their Brimstone attack in the same direction at the same speed. |
; [[The Haunt]] |
; [[The Haunt]] |
||
* Champion variants are transparent during their first phase. |
* Champion variants are transparent during their first phase. |
||
| Line 416: | Line 855: | ||
; [[Little Horn]] |
; [[Little Horn]] |
||
* Has new champion versions: |
* Has new champion versions: |
||
| − | ** Orange: Spits out an orange Troll Bomb instead of a black ball. The bomb deals contact damage and |
+ | ** Orange: Spits out an orange Troll Bomb instead of a black ball. The bomb deals contact damage and leave a patch of fire similar to [[Hot Bombs]]. |
** Black: Does not attack with Pits or troll bombs, but fires smoke balls more frequently. |
** Black: Does not attack with Pits or troll bombs, but fires smoke balls more frequently. |
||
; [[Mega Satan]] |
; [[Mega Satan]] |
||
| − | * If [[The Void]] is unlocked, there is a 50% chance that the game will not immediately end, and Mega Satan will instead drop an ending chest along with a portal. Entering the chest ends the game and plays the cutscene |
+ | * If [[The Void]] is unlocked, there is a 50% chance that the game will not immediately end, and Mega Satan will instead drop an ending chest along with a portal. Entering the chest ends the game and plays the cutscene while entering the portal will take Isaac to The Void. |
; [[Mom]] |
; [[Mom]] |
||
* Familiars are teleported to the player's position when entering the boss room. |
* Familiars are teleported to the player's position when entering the boss room. |
||
; [[Rag Man]] |
; [[Rag Man]] |
||
* Has new champion versions: |
* Has new champion versions: |
||
| − | ** Black: Spawns 2 spiders instead of a Ragling. Uses his resurrect frequently. This won't resurrect anything since the spiders don't leave corpses |
+ | ** Black: Spawns 2 spiders instead of a Ragling. Uses his resurrect frequently. This won't resurrect anything since the spiders don't leave corpses but still heals him. Sprays tears during his resurrection, similar to [[Monstro]]'s spit. |
| − | ** Red: No longer fires tears. Can have up to 4 Raglings at one time |
+ | ** Red: No longer fires tears. Can have up to 4 Raglings at one time and can revive up to 2 Raglings at once. |
; [[Triachnid]] |
; [[Triachnid]] |
||
* Has a death animation. |
* Has a death animation. |
||
| Line 441: | Line 880: | ||
; [[Womb]] |
; [[Womb]] |
||
* Womb trapdoors have a new sprite for when they are closed. |
* Womb trapdoors have a new sprite for when they are closed. |
||
| − | ; [[ |
+ | ; [[??? (Floor)|???]] |
* Additionally, an exit will spawn in the corner of the room, containing a [[Portal]] leading to [[The Void]]. |
* Additionally, an exit will spawn in the corner of the room, containing a [[Portal]] leading to [[The Void]]. |
||
; [[Cathedral]] |
; [[Cathedral]] |
||
| Line 450: | Line 889: | ||
; [[Treasure Room]] |
; [[Treasure Room]] |
||
* There is a chance that 2-3 [[Greed Gaper]]s may appear in the room. |
* There is a chance that 2-3 [[Greed Gaper]]s may appear in the room. |
||
| − | * Treasure rooms can rarely contain two items that can both be taken or [[poop]], [[trinket]] and a couple of pickups instead of an [[item]]. |
+ | * Treasure rooms can rarely contain two items that can both be taken or [[poop]], [[trinket]], and a couple of pickups instead of an [[item]]. |
* New layouts: |
* New layouts: |
||
[[File:Treasure Room 31.png|200px]][[File:Treasure Room 32.png|200px]][[File:Treasure Room 33.png|200px]][[File:Treasure Room 34.png|200px]][[File:Treasure Room 35.png|200px]][[File:Treasure Room 36.png|200px]][[File:Treasure Room 37.png|200px]][[File:Treasure Room 38.png|200px]][[File:Treasure Room 39.png|200px]] |
[[File:Treasure Room 31.png|200px]][[File:Treasure Room 32.png|200px]][[File:Treasure Room 33.png|200px]][[File:Treasure Room 34.png|200px]][[File:Treasure Room 35.png|200px]][[File:Treasure Room 36.png|200px]][[File:Treasure Room 37.png|200px]][[File:Treasure Room 38.png|200px]][[File:Treasure Room 39.png|200px]] |
||
; [[Shop]] |
; [[Shop]] |
||
| − | * There is a 20% chance for [[ |
+ | * There is a 20% chance for [[Donation Machine]] to be replaced by [[Restock Machine]]. |
* There is a small chance for the shop to be replaced by one of its two rare variants: |
* There is a small chance for the shop to be replaced by one of its two rare variants: |
||
[[File:Shop 7.png|200px]][[File:Shop 6.png|200px]] (the two pennies are [[Lucky penny|lucky pennies]]) |
[[File:Shop 7.png|200px]][[File:Shop 6.png|200px]] (the two pennies are [[Lucky penny|lucky pennies]]) |
||
| Line 470: | Line 909: | ||
; [[Secret Room]] |
; [[Secret Room]] |
||
* New theme: |
* New theme: |
||
| − | ** Angel Room: 3 [[ |
+ | ** Angel Room: 3 [[Soul Heart]]s, 2 [[Blue Fire Place]]s, Angel statue in center which does not drop key piece for respective [[angel]]. |
; [[Devil Room]] |
; [[Devil Room]] |
||
* Can contain: |
* Can contain: |
||
** 4 [[Deal with the devil|deals with the devil]] |
** 4 [[Deal with the devil|deals with the devil]] |
||
| − | ** 5 [[ |
+ | ** 5 [[Red Chest]]s |
| − | ** 3 [[ |
+ | ** 3 [[Devil Beggar]]s. |
* [[Urn]]s may spawn in the Devil Room. |
* [[Urn]]s may spawn in the Devil Room. |
||
| − | * An angel statue can rarely substitute the Satan statue |
+ | * An angel statue can rarely substitute the Satan statue and can be awoken with an explosion. |
** [[Angel]]s spawned in this way do not drop Key Pieces. |
** [[Angel]]s spawned in this way do not drop Key Pieces. |
||
| − | * [[Red |
+ | * [[Red Chest]]s inside a Devil Room no longer teleport the player to the Devil Room. |
; [[Angel Room]] |
; [[Angel Room]] |
||
| − | * Can contain 5 [[ |
+ | * Can contain 5 [[Soul Heart]]s. |
* Two angel statues can appear in the same room, allowing Isaac to fight both Uriel and Gabriel. It is possible to get both Key Pieces if Isaac awakes and fights each of them one by one; however, fighting both at once will only spawn one Key Piece corresponding to the last defeated angel. |
* Two angel statues can appear in the same room, allowing Isaac to fight both Uriel and Gabriel. It is possible to get both Key Pieces if Isaac awakes and fights each of them one by one; however, fighting both at once will only spawn one Key Piece corresponding to the last defeated angel. |
||
; [[Dice Room]] |
; [[Dice Room]] |
||
* The 1 pip room re-rolls each of Isaac's passive items into a random item from the specific item pool where it was acquired. |
* The 1 pip room re-rolls each of Isaac's passive items into a random item from the specific item pool where it was acquired. |
||
| − | * The 4 pips room rerolls item pedestals located in the [[ |
+ | * The 4 pips room rerolls item pedestals located in the [[Shop]] and the [[Library]]. |
* Have a small icon in the corner of the room that denotes what the effect of the room is. |
* Have a small icon in the corner of the room that denotes what the effect of the room is. |
||
; [[I AM ERROR]] |
; [[I AM ERROR]] |
||
| − | * Can contain two [[ |
+ | * Can contain two [[Blood Donation Machine]]s, two [[Beggar]]s, and two [[bed]]s. |
; [[Boss Rush]] |
; [[Boss Rush]] |
||
| Line 498: | Line 937: | ||
* Using the [[Black Rune]] will start the Boss Rush. |
* Using the [[Black Rune]] will start the Boss Rush. |
||
* New layout: |
* New layout: |
||
| − | [[File: |
+ | [[File:Boss Rush 6.png|200px]] |
; [[Crawl Space]] |
; [[Crawl Space]] |
||
| Line 510: | Line 949: | ||
; [[Mushroom (Obstacle)|Mushrooms]] |
; [[Mushroom (Obstacle)|Mushrooms]] |
||
* Have a chance to spawn [[Mushroom (Enemy)|Mushrooms]]. |
* Have a chance to spawn [[Mushroom (Enemy)|Mushrooms]]. |
||
| − | ; [[ |
+ | ; [[Reward plate]] |
* Locks the room when spawning enemies. |
* Locks the room when spawning enemies. |
||
; [[Silver button]] |
; [[Silver button]] |
||
| Line 517: | Line 956: | ||
* Takes damage exactly like their regular counterparts. |
* Takes damage exactly like their regular counterparts. |
||
; [[Spikes]] |
; [[Spikes]] |
||
| − | * No longer stay in their raised position when clearing [[ |
+ | * No longer stay in their raised position when clearing [[silver button|pressure plate]] rooms. |
| − | * Start (and remain) in their lowered position when entering a cleared [[ |
+ | * Start (and remain) in their lowered position when entering a cleared [[silver button|pressure plate]] room. |
=== Machines === |
=== Machines === |
||
; [[Donation Machine]] |
; [[Donation Machine]] |
||
* Donation gradually accelerates if the player stays in contact with the donation machine. |
* Donation gradually accelerates if the player stays in contact with the donation machine. |
||
| − | ; [[Greed |
+ | ; [[Greed Donation Machine]] |
* No longer jams when the HUD displays a jamming rate of 0%. |
* No longer jams when the HUD displays a jamming rate of 0%. |
||
* Donation gradually accelerates if the player stays in contact with the greed machine. |
* Donation gradually accelerates if the player stays in contact with the greed machine. |
||
| − | ; [[Slot |
+ | ; [[Slot Machine]] |
* Items dropped no longer revert to their generic stone pedestal look upon leaving and reentering the room. |
* Items dropped no longer revert to their generic stone pedestal look upon leaving and reentering the room. |
||
| Line 536: | Line 975: | ||
== Achievements == |
== Achievements == |
||
; General |
; General |
||
| − | * Popups can be fast |
+ | * Popups can be fast-forwarded by tapping Start. |
| + | |||
| + | [[Category:Dlc]] |
||
Revision as of 04:05, 11 May 2021
Menus
- The navigation is faster and loops back on itself when scrolling vertically.
- Loading screen
- Loading images are smoother.
Player
Characters
- General
- Adjusted the stats of each character in the character selection menu to better reflect their actual in-game stats.
- Adjusted pickup animation so items no longer obstruct Isaac's face.
- Bloodstains on costumes are now consistently the same color.
- Holding R to reset will consume an Eden Token and start a new run.
- Added 30 hairstyles.
- Can be randomized if the player has Eden tokens.
- Starts with Razor Blade only if it has been unlocked.
- Leaves a pool of blood behind instead of pee when walking between rooms at low HP.
- Starts with Cambion Conception only if it has been unlocked.
Transformations
- Its costume has color alts.
- Its costume has color alts.
- Its costume has color alts.
- Its costume has color alts.
Familiars
- Teleport to the player's new position if it was changed by a boss such as Gurdy or Mom's Heart.
- Most sources of Blue Spiders throw those spiders out instead of spawning them on the ground.
- Following familiars are no longer pushed back when very close to the player.
Co-op
- Co-op babies can no longer drop out while the player is playing a pickup animation.
Items
- General
- Mushroom items play their unique pickup sound.
Activated Collectibles
- General
- Some sprites changed:
| Item | Old sprite | New sprite |
|---|---|---|
| The Boomerang | ||
| Box of Spiders | ||
| D20 | ||
| D7 | ||
| Glass Cannon | ||
| Isaac's Tears | ||
| The Jar | ||
| Jar of Flies | ||
| Mega Blast | ||
| Ventricle Razor | ||
| We Need to Go Deeper! | File:Collectible We Need to Go Deeper! Rebirth icon.png | File:Collectible We Need to Go Deeper! icon.png |
- Can be held down between rooms.
- Added some visual feedback when it provides its invincibility.
- If Isaac swaps Butter Bean for a different active item, then picks up Butter Bean again, it has a small chance to transform into Wait What?.
- Re-rolls each of Isaac's passive items into a random item from the specific item pool where it was acquired.
- No longer spawns extra items for empty item pedestals.
- Poops spawned react to damage similarly to regular poops.
- Can catch Lil Haunts.
- Error: The given collectible ("Glowing Hour Glass") does not exist.
- Revert the player's character if it was changed by an item during the current room.
- Rewinds event counters (this includes donations and Eden's Blessings).
- Co-op babies are saved and restored.
- No longer duplicates Blue Flies, Blue Spiders and perma-charmed enemies.
- The number of flies is seeded.
- Lasers no longer have a chance to rotate.
- Its sprite changes based on how many hearts it contains.
- Its sprite changes based on how many flies it contains.
- Spawns a TNT barrel directly at the player's position rather than on a nearby free tile.
- Its costume has color alts.
- Adjusted the contents in Greed mode.
- Plays its use animation.
- Damage halved to compensate.
- The Void is reset on exiting the I AM ERROR room and can be cleared repeatedly as long as the player is able to gather enough charges to successfully warp to it.
- Portals will now appear closed if they have no connected portal.
- Portals got a few minor visual tweaks.
Passive Collectibles
- General
- Some sprites changed:
- Decreased the damage rate of level 3 and 4 to match Cube of Meat.
- Self-recharging active items can charge the yellow meter, allowing Isaac to use them twice immediately.
- No longer triggers if there are fewer than 2 enemies in the room.
- Its costume has color alts.
- Increases spawner familiar spawn rates.
- Makes the darkness from Curse of Darkness fade away instead of immediately lighting the room up.
- Its costume has color alts.
- Its costume has color alts.
- Its costume has color alts.
- Its costume has color alts.
- The multiplier will no longer be lost when hitting poops or TNT barrels.
- Error: The given collectible ("E Coli") does not exist.
- Poops spawned react to damage similarly to regular poops.
- Is now limited to a maximum of 10 to prevent potential crashes.
- Being hit, changing rooms, and using items no longer reset the Epiphora bonus.
- During the delay when transitioning between rooms, picking up an item, or using an active item, it's possible to change firing direction without resetting the bonus.
- Its costume has color alts.
- New possible effects:
- Added extra familiar animations.
- The effect also applies to locusts.
- Its costume has color alts.
- The shield is no longer restored if the player saves and continues after losing it.
- Its costume has color alts.
- Will drop from angels that are not in Angel Rooms.
- Causes Isaac to fire "tears" from the middle instead of from his eyes, and at a slightly lower height.
- Got renamed from "Lil' Brimstone" to "Lil Brimstone".
- Can damage Fire Places and poops.
- Got renamed from "Lil' Haunt" to "Lil Haunt".
- Its costume has color alts.
- Only affects the player and Incubus's tears.
- Its costume has color alts.
- Causes Isaac to fire "tears" from the middle instead of from his eyes, and at a slightly lower height.
- Its costume no longer overwrites the player's skin color to pink instead of white.
- Converts:
- ??? into Telepills
- Addicted into Percs!
- Paralysis into Pheromones
- Retro Vision into I can see forever!
- R U A Wizard? into Power Pill!
- X-Lax into Something's wrong...
- Its costume has color alts.
- Better visualization of Purity's glow.
- Purchasing an item that is on sale will replace it with another that is on sale.
- Can damage Fire Places and poops.
- Tears bounce off bombs.
- Spectral tears no longer bounce off rocks.
- Its costume has color alts.
- Bombs actually scatter around.
- Small bombs leave smaller craters.
- The speed and tears changes will take effect immediately. Without Afterbirth+, they didn't immediately change until Isaac's speed or tears stats are updated the next time.
- Items have a chance to be discounted further by random sales; for example, a discounted item originally costing 5 coins will then cost 2 coins instead of 3.
- Its costume has color alts.
- Grants its damage bonus when obtained via Cambion Conception.
- Its costume has color alts.
Trinkets
- General
- Some sprites changed:
- Affects Bomb Chests.
- Wrath and Super Wrath's bombs turn into their respective pickups.
Interactions
 ? Card + Error: The given collectible ("Glowing Hour Glass") does not exist. - The ? Card doesn't get refunded upon usage anymore.
- 9 Volt + The Candle - The Candle starts at half charge after use.
- A Lump of Coal + Athame - Damage to the ring of Athame is no longer reduced by half.
- A Lump of Coal + Maw Of The Void - Damage to the Maw ring is no longer reduced by half.
- Athame + Proptosis - The ring deals normal damage.
- Brimstone + Ipecac - Isaac shoots Ipecac tears while charging Brimstone. Isaac gains increased damage, decreased tears, and the poison effect.
- Car Battery + Mine Crafter - Spawns two TNT barrels.
- Cursed Eye + Incubus - A burst of tears is fired, but it does not need to be charged.
- Epic Fetus + Monstro's Lung - As of current version this synergy is bugged and only a single missile fires.
- Ipecac + The Ludovico Technique - +4 damage bonus, no explosion.
- Ipecac + Mom's Knife - Also adds +4 damage.
- The Ludovico Technique + Multidimensional Baby - An additional Ludovico tear is spawned when it passes through Multidimensional Baby, at the start of every room, and persists like the Ludovico tear itself.
- Maw Of The Void + Proptosis - The ring deals normal damage.
Pickups
- General
- Can be picked up as soon as they hit the ground.
- Pickup velocities are seeded from machines, beggars, Tinted Rocks, chests, sacks, and bosses.
Hearts
- Has unique sounds.
- Takes half a heart worth of damage from any lethal hit taken with only Soul Hearts.
- Turns nearby enemies to gold when breaking.
- Added better visual feedback when breaking.
- Minimap icon added.
- Has unique sounds.
- Minimap icon added.
Coins
- Has a green shine.
Bombs
- Has unique sounds.
Pills
- Has narration.
Cards and Runes
- Its card ID is 48 instead of 43.
- Has a unique card back.
- Has a unique card back.
- Has a unique card back.
- Has a unique card back.
Chests
- General
- Items dropped no longer revert to their generic stone pedestal look upon leaving and reentering the room.
- The Golden Chest pool also includes bags, such as IV Bag or Sack of Pennies.
Entities
Monsters
- General
- Champion enemies no longer deal contact damage if the non-champion version doesn't.
- Charmed enemies prioritize non-charmed enemies unless there aren't any.
- Permanently charmed enemies no longer try to go after Punching Bag.
- Permanently charmed enemies can shoot projectiles through each other and familiars.
- Monster replacements will now only occur with enemies spawned as part of the room layout.
- Is chained to an adjacent rock if the nearest wall is more than 1 grid cell away.
- No longer blink when the player has Bursting Sack.
- Reduced Base HP and added stage HP.
- Has a proper appearance animation if spawned by a room rather than by a boss.
- Added extra sounds and effects to creep attacks.
- No longer deals contact damage during its death animation.
- Has a proper appearance animation if spawned by a room rather than by a boss.
- Is chained to an adjacent rock if the nearest wall is more than 1 grid cell away.
- Is no longer considered a boss.
- Has a unique death portrait.
- Its body is red when in the Scarred Womb.
- Added extra sounds and effects to creep attacks.
- Make a sound when stomping.
- Its brimstone is no longer moved upwards and no longer causes the player to take damage along the top wall in Womb/Utero room #202.
- Its attack animation slightly longer.
- No longer blink when the player has Bursting Sack.
- Stone Grimace and all its variants
- Explodes into rock debris when killed with Chaos Card or Little Horn.
- Closes its eyes when the room is cleared.
- No longer respawn when reentering the room if killed.
- Renamed from "Fat Fly" to "Super Pooter".
Mini-Bosses
- The Greed fight before Ultra Greed triggers the victory jingle when cleared.
- No longer plays its appear animation if encountered in an already cleared room.
- Can drop Head of the Keeper.
- Spawns with its head retracted and extends over 2 seconds.
Bosses
- Has new a champion version:
- Black: Spawns up to 3 Chargers at once instead of Corns. Upon death, spawns 2 Dank Squirts.
- Its grey creep blinks.
- Moves to a more appropriate place to perform his Brimstone attack in L-shaped rooms.
- Multiple Forsakens in the same room can spawn their own Bony each and always spin their Brimstone attack in the same direction at the same speed.
- Champion variants are transparent during their first phase.
- Due to the way entity stacking works ??? may rarely appear instead and once defeated will skip "phase 2" entirely and will give a completion mark as if Hush was defeated.
- Does a short dash towards the player before doing a spinning Brimstone attack.
- Can shoot Brimstone lasers in all 4 diagonal directions.
- No longer do its rotating Brimstone attack when close to a wall.
- Has new champion versions:
- Orange: Spits out an orange Troll Bomb instead of a black ball. The bomb deals contact damage and leave a patch of fire similar to Hot Bombs.
- Black: Does not attack with Pits or troll bombs, but fires smoke balls more frequently.
- If The Void is unlocked, there is a 50% chance that the game will not immediately end, and Mega Satan will instead drop an ending chest along with a portal. Entering the chest ends the game and plays the cutscene while entering the portal will take Isaac to The Void.
- Familiars are teleported to the player's position when entering the boss room.
- Has new champion versions:
- Black: Spawns 2 spiders instead of a Ragling. Uses his resurrect frequently. This won't resurrect anything since the spiders don't leave corpses but still heals him. Sprays tears during his resurrection, similar to Monstro's spit.
- Red: No longer fires tears. Can have up to 4 Raglings at one time and can revive up to 2 Raglings at once.
- Has a death animation.
Creeps
- No longer be darkened in the Scarred Womb.
Environment
- General
- Added some backdrop tiling fixes.
- Pit seams are fixed.
Chapters
- Womb trapdoors have a new sprite for when they are closed.
- Additionally, an exit will spawn in the corner of the room, containing a Portal leading to The Void.
- Has a new floor transition animation.
- Some rooms contain Angel Statues that can be bombed to summon the Angels and acquire key pieces.
Rooms
- There is a chance that 2-3 Greed Gapers may appear in the room.
- Treasure rooms can rarely contain two items that can both be taken or poop, trinket, and a couple of pickups instead of an item.
- New layouts:

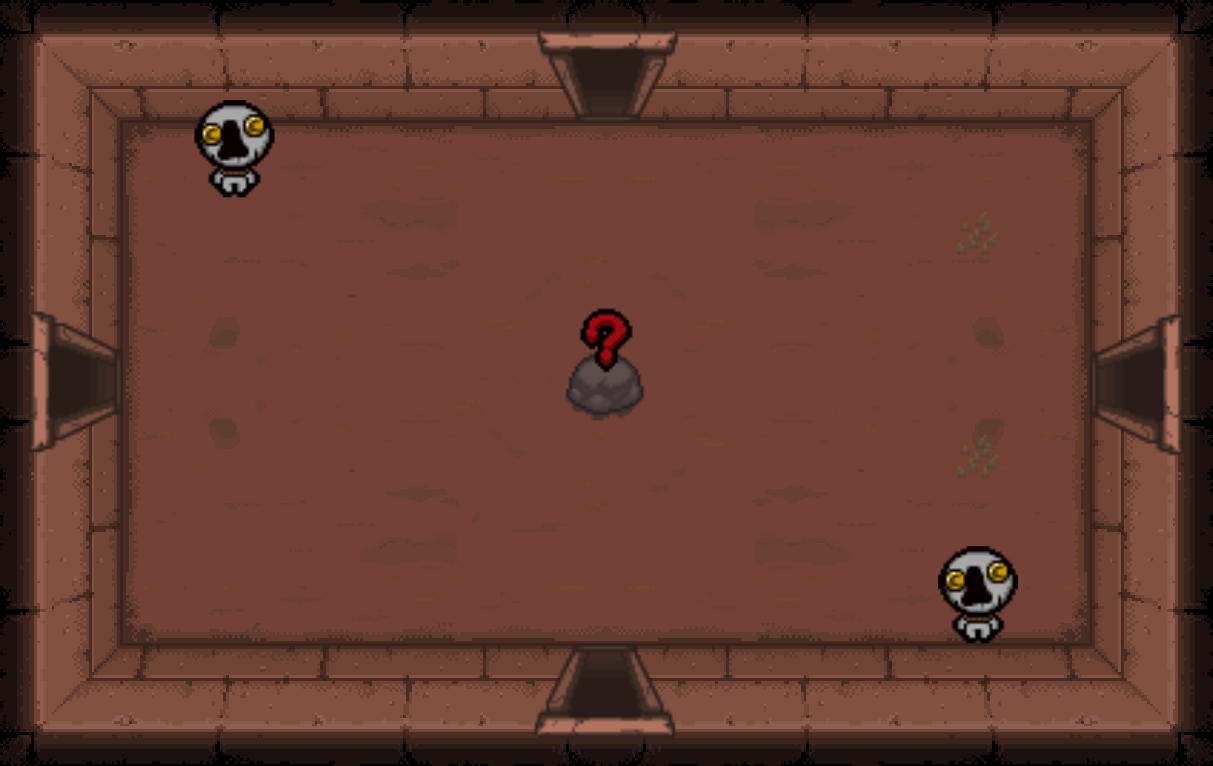
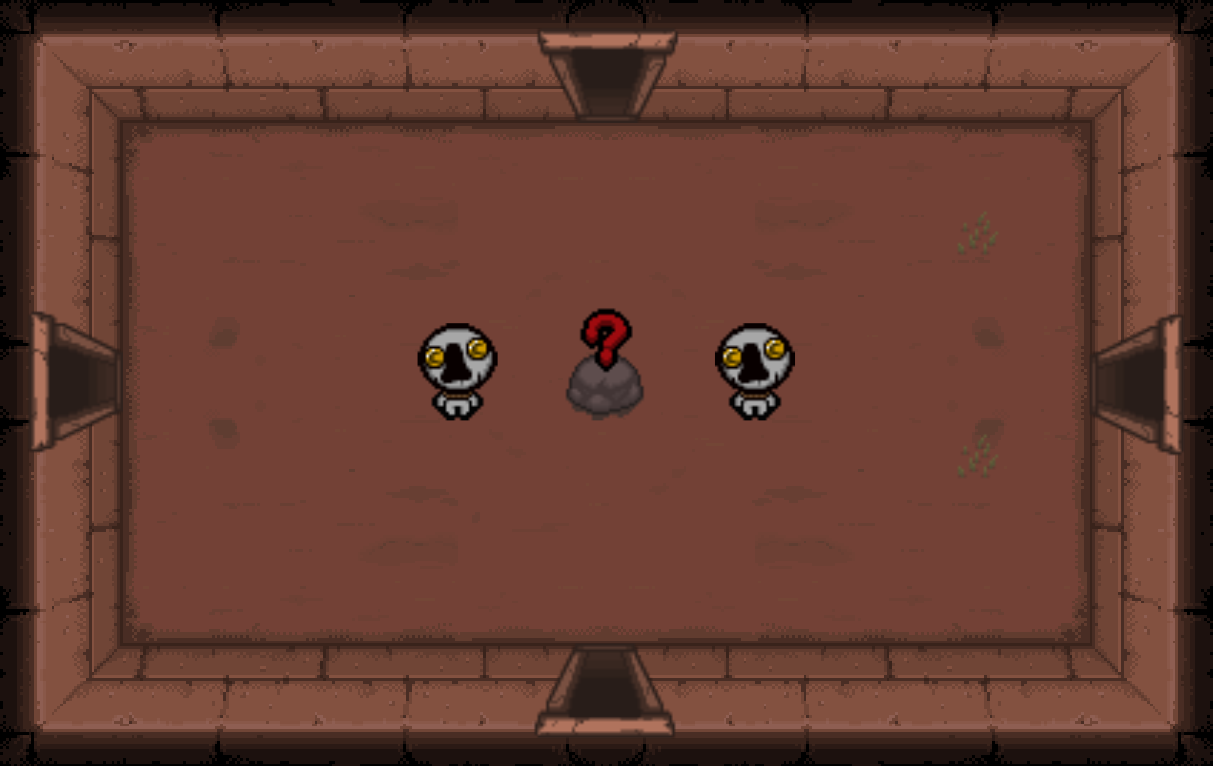
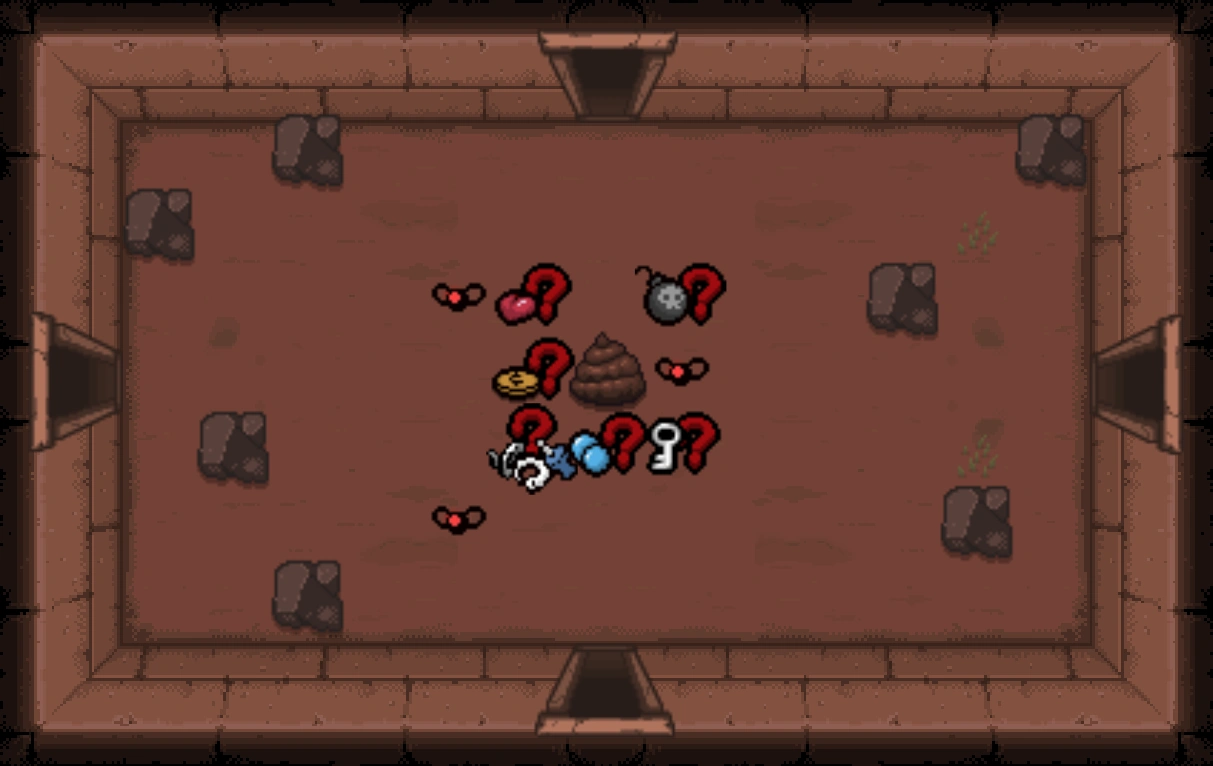
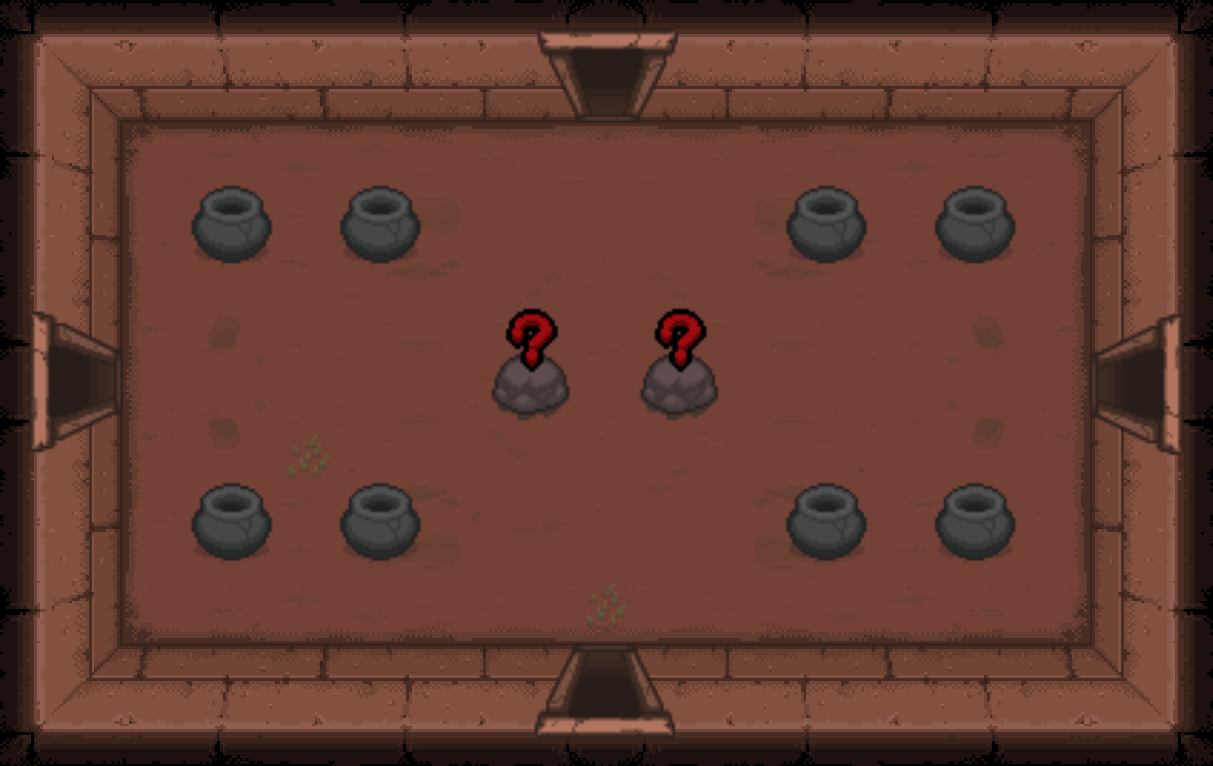
- There is a 20% chance for Donation Machine to be replaced by Restock Machine.
- There is a small chance for the shop to be replaced by one of its two rare variants:

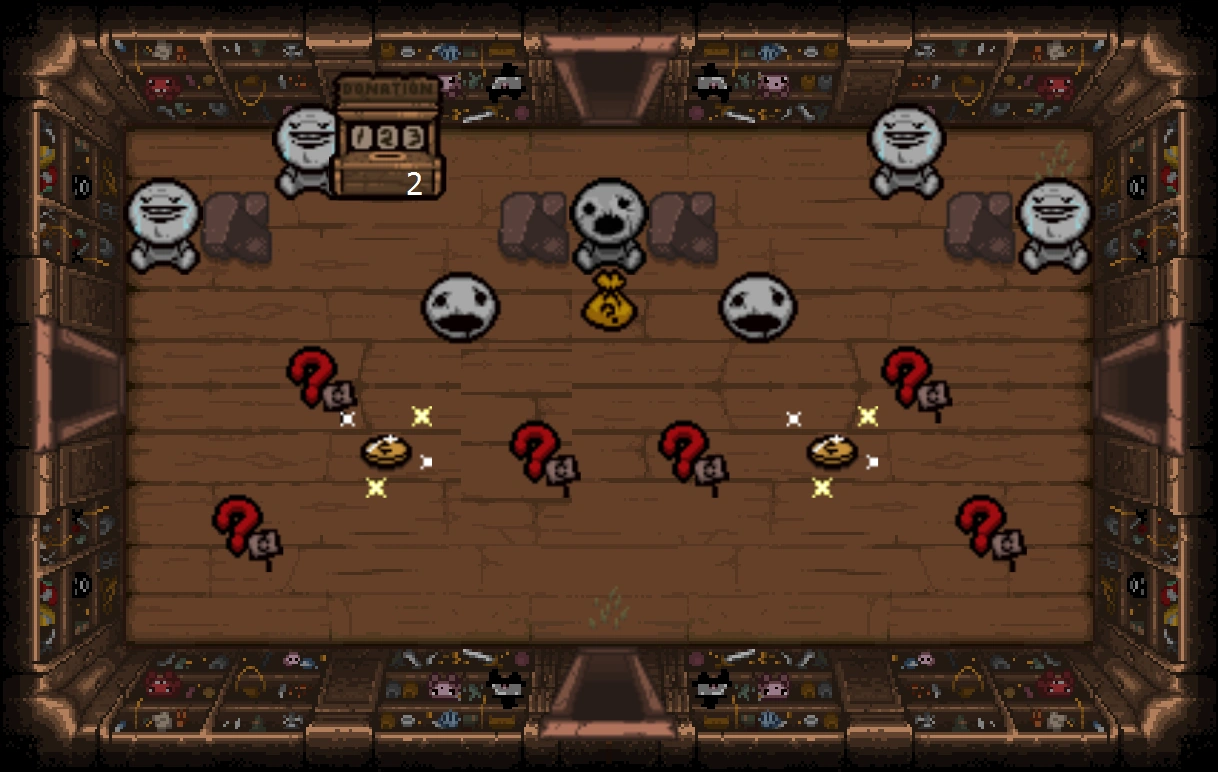 (the two pennies are lucky pennies)
- Minimap icon changed.
- New layout:
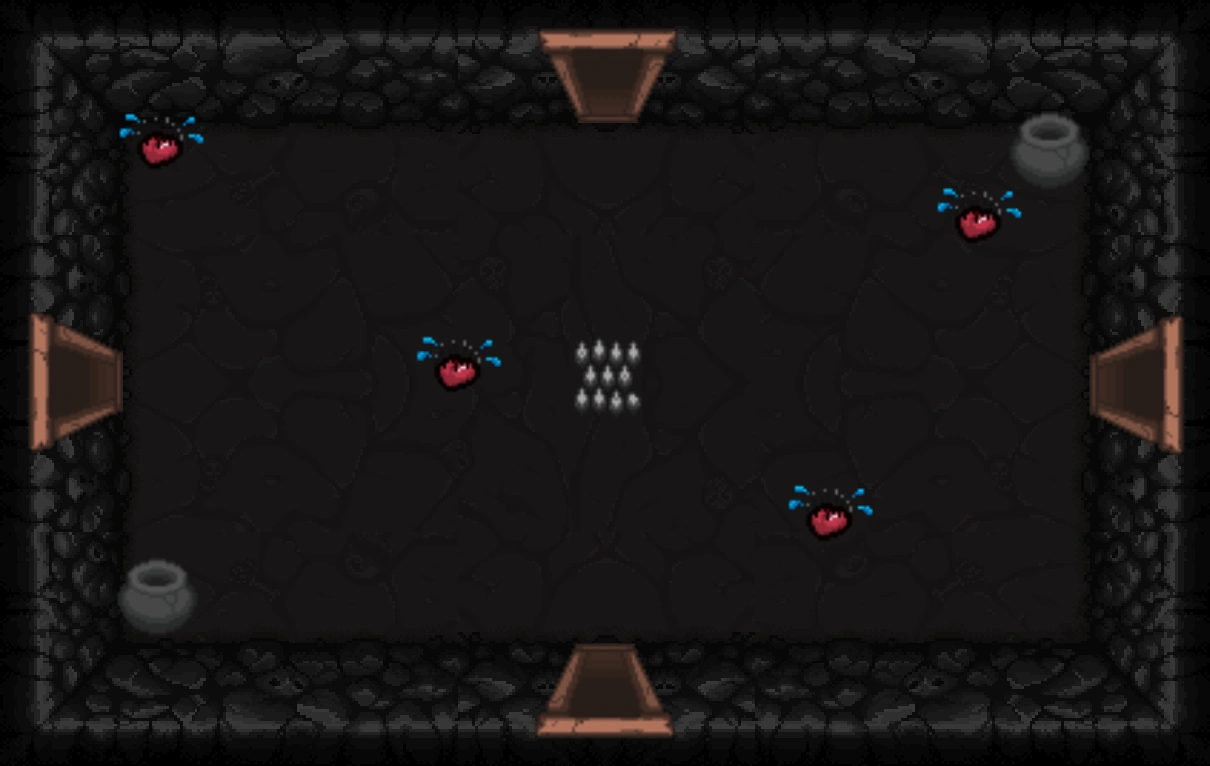
- New theme:
- Angel Room: 3 Soul Hearts, 2 Blue Fire Places, Angel statue in center which does not drop key piece for respective angel.
- Can contain:
- Urns may spawn in the Devil Room.
- An angel statue can rarely substitute the Satan statue and can be awoken with an explosion.
- Angels spawned in this way do not drop Key Pieces.
- Red Chests inside a Devil Room no longer teleport the player to the Devil Room.
- Can contain 5 Soul Hearts.
- Two angel statues can appear in the same room, allowing Isaac to fight both Uriel and Gabriel. It is possible to get both Key Pieces if Isaac awakes and fights each of them one by one; however, fighting both at once will only spawn one Key Piece corresponding to the last defeated angel.
- The 1 pip room re-rolls each of Isaac's passive items into a random item from the specific item pool where it was acquired.
- The 4 pips room rerolls item pedestals located in the Shop and the Library.
- Have a small icon in the corner of the room that denotes what the effect of the room is.
- Can contain two Blood Donation Machines, two Beggars, and two beds.
- There is a small chance that there will be 8 items to choose from.
- Using the Black Rune will start the Boss Rush.
- New layout:

- New layouts (rares):
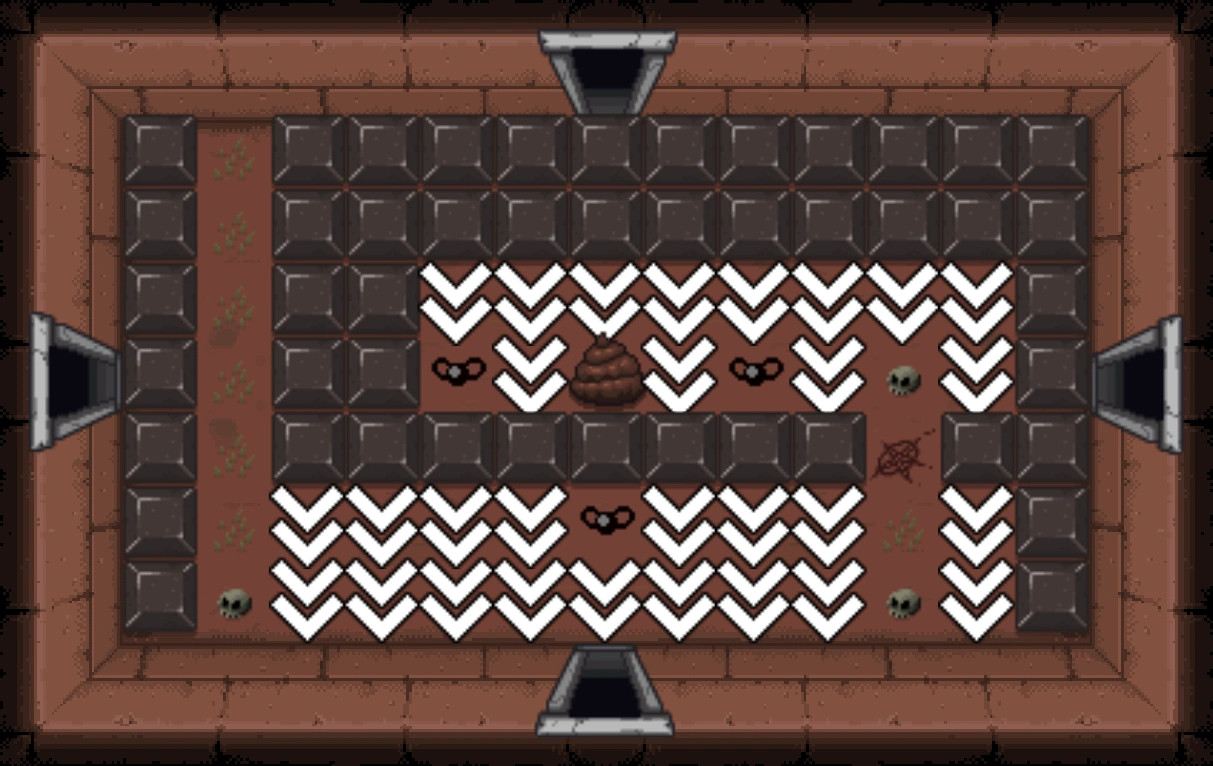
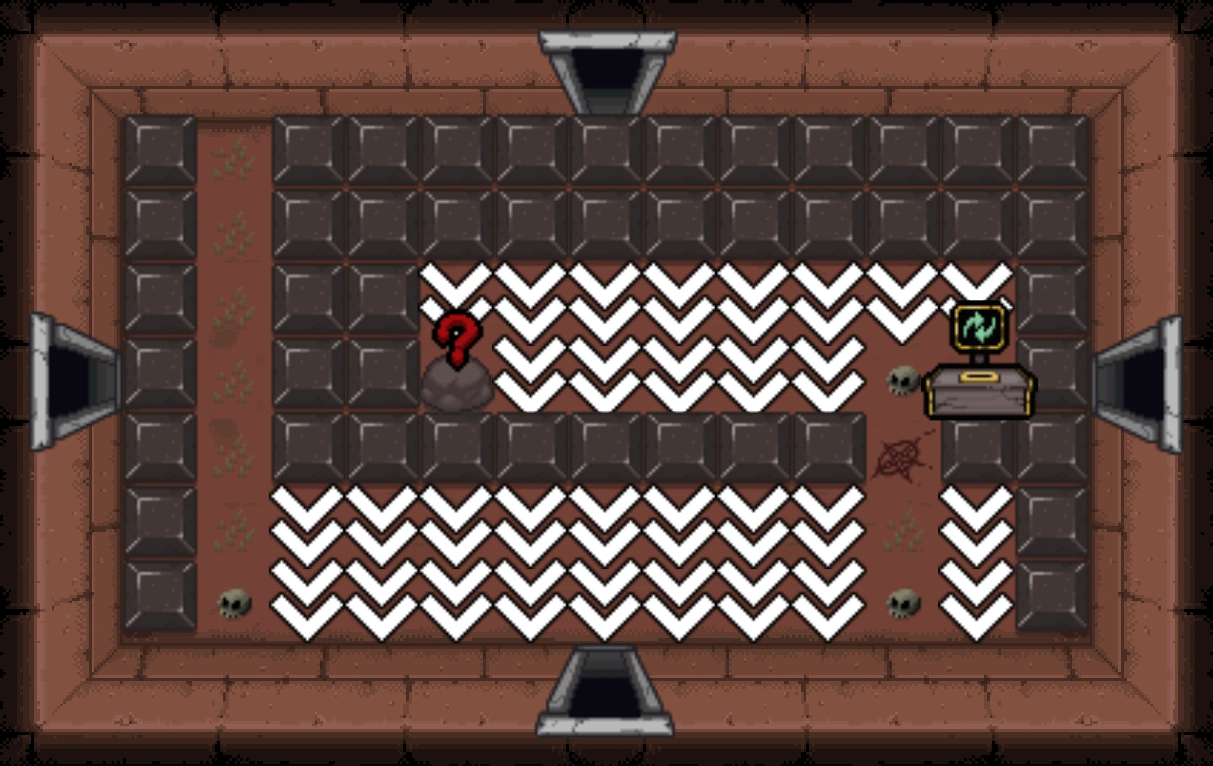
- Players can no longer access the Black Market through the wall glitch. However, it is still possible to access the Black Market using the glitch via special circumstances including having Ipecac and The Inner Eye.
Obstacles
- Have a chance to spawn Mushrooms.
- Reward plate
- Locks the room when spawning enemies.
- Silver button
- No longer grants a charge when bombing out of its room.
- Takes damage exactly like their regular counterparts.
- No longer stay in their raised position when clearing pressure plate rooms.
- Start (and remain) in their lowered position when entering a cleared pressure plate room.
Machines
- Donation gradually accelerates if the player stays in contact with the donation machine.
- No longer jams when the HUD displays a jamming rate of 0%.
- Donation gradually accelerates if the player stays in contact with the greed machine.
- Items dropped no longer revert to their generic stone pedestal look upon leaving and reentering the room.
Challenges
- Killing Delirium will count as completing challenges.
- Gives only The Negative after defeating Mom, forcing you to progress through Sheol and the Dark Room instead of the Cathedral and The Chest.
Achievements
- General
- Popups can be fast-forwarded by tapping Start.