(Item template) |
(Nodlc) |
||
| Line 75: | Line 75: | ||
=== Activated Collectibles === |
=== Activated Collectibles === |
||
{{Table | Active | |
{{Table | Active | |
||
| − | {{Item|Box of Friends|table}} |
+ | {{Item|Box of Friends|table-nodlc}} |
| − | {{Item|D12|table}} |
+ | {{Item|D12|table-nodlc}} |
| − | {{Item|D7|table}} |
+ | {{Item|D7|table-nodlc}} |
| − | {{Item|D8|table}} |
+ | {{Item|D8|table-nodlc}} |
| − | {{Item|Diplopia|table}} |
+ | {{Item|Diplopia|table-nodlc}} |
| − | {{Item|Friendly Ball|table}} |
+ | {{Item|Friendly Ball|table-nodlc}} |
| − | {{Item|Glass Cannon|table}} |
+ | {{Item|Glass Cannon|table-nodlc}} |
| − | {{Item|Glowing Hour Glass|table}} |
+ | {{Item|Glowing Hour Glass|table-nodlc}} |
| − | {{Item|Jar of Flies|table}} |
+ | {{Item|Jar of Flies|table-nodlc}} |
| − | {{Item|Kidney Bean|table}} |
+ | {{Item|Kidney Bean|table-nodlc}} |
| − | {{Item|Mega Bean|table}} |
+ | {{Item|Mega Bean|table-nodlc}} |
| − | {{Item|Mega Blast|table}} |
+ | {{Item|Mega Blast|table-nodlc}} |
| − | {{Item|Mine Crafter|table}} |
+ | {{Item|Mine Crafter|table-nodlc}} |
| − | {{Item|Mom's Box|table}} |
+ | {{Item|Mom's Box|table-nodlc}} |
| − | {{Item|Placebo|table}} |
+ | {{Item|Placebo|table-nodlc}} |
| − | {{Item|Tear Detonator|table}} |
+ | {{Item|Tear Detonator|table-nodlc}} |
| − | {{Item|Teleport 2.0|table}} |
+ | {{Item|Teleport 2.0|table-nodlc}} |
| − | {{Item|Ventricle Razor|table}} |
+ | {{Item|Ventricle Razor|table-nodlc}} |
| − | {{Item|Wooden Nickel|table}} |
+ | {{Item|Wooden Nickel|table-nodlc}} |
}} |
}} |
||
=== Passive Collectibles === |
=== Passive Collectibles === |
||
{{Table | Passive | |
{{Table | Passive | |
||
| − | {{Item|8 Inch Nails|table}} |
+ | {{Item|8 Inch Nails|table-nodlc}} |
| − | {{Item|Athame|table}} |
+ | {{Item|Athame|table-nodlc}} |
| − | {{Item|Betrayal|table}} |
+ | {{Item|Betrayal|table-nodlc}} |
| − | {{Item|Binky|table}} |
+ | {{Item|Binky|table-nodlc}} |
| − | {{Item|Black Powder|table}} |
+ | {{Item|Black Powder|table-nodlc}} |
| − | {{Item|Bomber Boy|table}} |
+ | {{Item|Bomber Boy|table-nodlc}} |
| − | {{Item|Bumbo|table}} |
+ | {{Item|Bumbo|table-nodlc}} |
| − | {{Item|Bursting Sack|table}} |
+ | {{Item|Bursting Sack|table-nodlc}} |
| − | {{Item|Cambion Conception|table}} |
+ | {{Item|Cambion Conception|table-nodlc}} |
| − | {{Item|Car Battery|table}} |
+ | {{Item|Car Battery|table-nodlc}} |
| − | {{Item|Censer|table}} |
+ | {{Item|Censer|table-nodlc}} |
| − | {{Item|Chaos|table}} |
+ | {{Item|Chaos|table-nodlc}} |
| − | {{Item|Charged Baby|table}} |
+ | {{Item|Charged Baby|table-nodlc}} |
| − | {{Item|Circle of Protection|table}} |
+ | {{Item|Circle of Protection|table-nodlc}} |
| − | {{Item|Continuum|table}} |
+ | {{Item|Continuum|table-nodlc}} |
| − | {{Item|Crack Jacks|table}} |
+ | {{Item|Crack Jacks|table-nodlc}} |
| − | {{Item|Crown of Light|table}} |
+ | {{Item|Crown of Light|table-nodlc}} |
| − | {{Item|Curse of the Tower|table}} |
+ | {{Item|Curse of the Tower|table-nodlc}} |
| − | {{Item|Dead Eye|table}} |
+ | {{Item|Dead Eye|table-nodlc}} |
| − | {{Item|Deep Pockets|table}} |
+ | {{Item|Deep Pockets|table-nodlc}} |
| − | {{Item|Eden's Blessing|table}} |
+ | {{Item|Eden's Blessing|table-nodlc}} |
| − | {{Item|Empty Vessel|table}} |
+ | {{Item|Empty Vessel|table-nodlc}} |
| − | {{Item|Epiphora|table}} |
+ | {{Item|Epiphora|table-nodlc}} |
| − | {{Item|Evil Eye|table}} |
+ | {{Item|Evil Eye|table-nodlc}} |
| − | {{Item|Explosivo|table}} |
+ | {{Item|Explosivo|table-nodlc}} |
| − | {{Item|Farting Baby|table}} |
+ | {{Item|Farting Baby|table-nodlc}} |
| − | {{Item|Fate's Reward|table}} |
+ | {{Item|Fate's Reward|table-nodlc}} |
| − | {{Item|Friend Zone|table}} |
+ | {{Item|Friend Zone|table-nodlc}} |
| − | {{Item|Fruit Cake|table}} |
+ | {{Item|Fruit Cake|table-nodlc}} |
| − | {{Item|GB Bug|table}} |
+ | {{Item|GB Bug|table-nodlc}} |
| − | {{Item|Glitter Bombs|table}} |
+ | {{Item|Glitter Bombs|table-nodlc}} |
| − | {{Item|God's Flesh|table}} |
+ | {{Item|God's Flesh|table-nodlc}} |
| − | {{Item|Head of the Keeper|table}} |
+ | {{Item|Head of the Keeper|table-nodlc}} |
| − | {{Item|Holy Light!|table}} |
+ | {{Item|Holy Light!|table-nodlc}} |
| − | {{Item|Host Hat|table}} |
+ | {{Item|Host Hat|table-nodlc}} |
| − | {{Item|Immaculate Conception|table}} |
+ | {{Item|Immaculate Conception|table-nodlc}} |
| − | {{Item|Incubus|table}} |
+ | {{Item|Incubus|table-nodlc}} |
| − | {{Item|Key Bum|table}} |
+ | {{Item|Key Bum|table-nodlc}} |
| − | {{Item|Kidney Stone|table}} |
+ | {{Item|Kidney Stone|table-nodlc}} |
| − | {{Item|Lil Chest|table}} |
+ | {{Item|Lil' Chest|table-nodlc}} |
| − | {{Item|Lil Gurdy|table}} |
+ | {{Item|Lil Gurdy|table-nodlc}} |
| − | {{Item|Lil Loki|table}} |
+ | {{Item|Lil' Loki|table-nodlc}} |
| − | {{Item|Lost Fly|table}} |
+ | {{Item|Lost Fly|table-nodlc}} |
| − | {{Item|Lusty Blood|table}} |
+ | {{Item|Lusty Blood|table-nodlc}} |
| − | {{Item|Marked|table}} |
+ | {{Item|Marked|table-nodlc}} |
| − | {{Item|Maw of the Void|table}} |
+ | {{Item|Maw of the Void|table-nodlc}} |
| − | {{Item|Milk!|table}} |
+ | {{Item|Milk!|table-nodlc}} |
| − | {{Item|Mom's Pearls|table}} |
+ | {{Item|Mom's Pearls|table-nodlc}} |
| − | {{Item|More Options|table}} |
+ | {{Item|More Options|table-nodlc}} |
| − | {{Item|Mr. Dolly|table}} |
+ | {{Item|Mr. Dolly|table-nodlc}} |
| − | {{Item|Multidimensional Baby|table}} |
+ | {{Item|Multidimensional Baby|table-nodlc}} |
| − | {{Item|My Shadow|table}} |
+ | {{Item|My Shadow|table-nodlc}} |
| − | {{Item|Night Light|table}} |
+ | {{Item|Night Light|table-nodlc}} |
| − | {{Item|No. 2|table}} |
+ | {{Item|No. 2|table-nodlc}} |
| − | {{Item|Papa Fly|table}} |
+ | {{Item|Papa Fly|table-nodlc}} |
| − | {{Item|Pay To Play|table}} |
+ | {{Item|Pay To Play|table-nodlc}} |
| − | {{Item|PJs|table}} |
+ | {{Item|PJs|table-nodlc}} |
| − | {{Item|Pupula Duplex|table}} |
+ | {{Item|Pupula Duplex|table-nodlc}} |
| − | {{Item|Purity|table}} |
+ | {{Item|Purity|table-nodlc}} |
| − | {{Item|Obsessed Fan|table}} |
+ | {{Item|Obsessed Fan|table-nodlc}} |
| − | {{Item|Restock|table}} |
+ | {{Item|Restock|table-nodlc}} |
| − | {{Item|Rune Bag|table}} |
+ | {{Item|Rune Bag|table-nodlc}} |
| − | {{Item|Sack Head|table}} |
+ | {{Item|Sack Head|table-nodlc}} |
| − | {{Item|Scatter Bombs|table}} |
+ | {{Item|Scatter Bombs|table-nodlc}} |
| − | {{Item|Seraphim|table}} |
+ | {{Item|Seraphim|table-nodlc}} |
| − | {{Item|Serpent's Kiss|table}} |
+ | {{Item|Serpent's Kiss|table-nodlc}} |
| − | {{Item|Sticky Bombs|table}} |
+ | {{Item|Sticky Bombs|table-nodlc}} |
| − | {{Item|Spear of Destiny|table}} |
+ | {{Item|Spear of Destiny|table-nodlc}} |
| − | {{Item|Spider Mod|table}} |
+ | {{Item|Spider Mod|table-nodlc}} |
| − | {{Item|Succubus|table}} |
+ | {{Item|Succubus|table-nodlc}} |
| − | {{Item|Sworn Protector|table}} |
+ | {{Item|Sworn Protector|table-nodlc}} |
| − | {{Item|Tech X|table}} |
+ | {{Item|Tech X|table-nodlc}} |
| − | {{Item|Toxic Shock|table}} |
+ | {{Item|Toxic Shock|table-nodlc}} |
| − | {{Item|Tractor Beam|table}} |
+ | {{Item|Tractor Beam|table-nodlc}} |
| − | {{Item|The Wiz|table}} |
+ | {{Item|The Wiz|table-nodlc}} |
| − | {{Item|Zodiac|table}} |
+ | {{Item|Zodiac|table-nodlc}} |
}} |
}} |
||
| Line 180: | Line 180: | ||
{{Table | Trinket | |
{{Table | Trinket | |
||
| − | {{Item|Blasting Cap|table}} |
+ | {{Item|Blasting Cap|table-nodlc}} |
| − | {{Item|Black Feather|table}} |
+ | {{Item|Black Feather|table-nodlc}} |
| − | {{Item|Blind Rage|table}} |
+ | {{Item|Blind Rage|table-nodlc}} |
| − | {{Item|Blister|table}} |
+ | {{Item|Blister|table-nodlc}} |
| − | {{Item|Brown Cap|table}} |
+ | {{Item|Brown Cap|table-nodlc}} |
| − | {{Item|Bob's Bladder|table}} |
+ | {{Item|Bob's Bladder|table-nodlc}} |
| − | {{Item|Child Leash|table}} |
+ | {{Item|Child Leash|table-nodlc}} |
| − | {{Item|Cracked Dice|table}} |
+ | {{Item|Cracked Dice|table-nodlc}} |
| − | {{Item|Endless Nameless|table}} |
+ | {{Item|Endless Nameless|table-nodlc}} |
| − | {{Item|Error|table}} |
+ | {{Item|Error|table-nodlc}} |
| − | {{Item|Faded Polaroid|table}} |
+ | {{Item|Faded Polaroid|table-nodlc}} |
| − | {{Item|Golden Horse Shoe|table}} |
+ | {{Item|Golden Horse Shoe|table-nodlc}} |
| − | {{Item|Karma|table}} |
+ | {{Item|Karma|table-nodlc}} |
| − | {{Item|Lazy Worm|table}} |
+ | {{Item|Lazy Worm|table-nodlc}} |
| − | {{Item|Lil Larva|table}} |
+ | {{Item|Lil Larva|table-nodlc}} |
| − | {{Item|Louse|table}} |
+ | {{Item|Louse|table-nodlc}} |
| − | {{Item|Mom's Locket|table}} |
+ | {{Item|Mom's Locket|table-nodlc}} |
| − | {{Item|NO!|table}} |
+ | {{Item|NO!|table-nodlc}} |
| − | {{Item|Poker Chip|table}} |
+ | {{Item|Poker Chip|table-nodlc}} |
| − | {{Item|Rainbow Worm|table}} |
+ | {{Item|Rainbow Worm|table-nodlc}} |
| − | {{Item|Rib of Greed|table}} |
+ | {{Item|Rib of Greed|table-nodlc}} |
| − | {{Item|Safety Scissors|table}} |
+ | {{Item|Safety Scissors|table-nodlc}} |
| − | {{Item|Second Hand|table}} |
+ | {{Item|Second Hand|table-nodlc}} |
| − | {{Item|Shiny Rock|table}} |
+ | {{Item|Shiny Rock|table-nodlc}} |
| − | {{Item|Store Key|table}} |
+ | {{Item|Store Key|table-nodlc}} |
| − | {{Item|Stud Finder|table}} |
+ | {{Item|Stud Finder|table-nodlc}} |
| − | {{Item|Super Magnet|table}} |
+ | {{Item|Super Magnet|table-nodlc}} |
| − | {{Item|Tape Worm|table}} |
+ | {{Item|Tape Worm|table-nodlc}} |
| − | {{Item|Watch Battery|table}} |
+ | {{Item|Watch Battery|table-nodlc}} |
}} |
}} |
||
Revision as of 15:35, 11 March 2017
The Binding of Isaac: Afterbirth is the expansion to The Binding of Isaac: Rebirth. The DLC was released on October 30th, 2015 and costs $10.99/£7.99. It was released on May 10, 2016 on Xbox One and PS4.
For a list of the pre-release blog posts, see The Binding of Isaac: Afterbirth (Pre-Release).
Features
- Greed Mode: A new game mode with a heavy focus on risk/reward, featuring a new ending and final boss.
- Blue Womb: A new area, featuring a new ending and final boss.
- Daily Runs: Daily seeded runs with online leaderboards.
- Two new characters, Lilith and Keeper.
- 95 new items and 29 new trinkets.
- New pickups, chests, pills, and cards.
- 10 new challenges.
- 4 new alternate chapters: Burning Basement, Flooded Caves, Dank Depths, and Scarred Womb.
- Many new room layouts including tiny rooms, long hallways, and L-shaped rooms.
- New room types like trap rooms, double treasure rooms, and closets.
- New special seeds, along with a seed code combo page.
- An expanded soundtrack.
- An extra HUD option, allowing items picked up to be displayed on-screen.
- 9 new transformations.
- New bosses, along with new variations of bosses introduced in Rebirth.
- New monsters.
- Updated item combo system.
- New achievements.
- New co-op babies.
- An improved collection page that shows item descriptions.
Additions
Characters
| Character |  Lilith |
 Keeper |
|---|---|---|
| Template:RedHeartTemplate:BlackHeartTemplate:BlackHeart | Template:CoinHeartTemplate:CoinHeart | |
| 3.5 (*1.00) | 3.5 (*1.20) | |
| Blindfolded | ||
| Blindfolded | 1 | |
| Blindfolded | 23.75 | |
| 1.0 | 0.85 | |
| 0 | -2 | |
| None | x1 Bombs | |
| Incubus, Box Of Friends |
Triple shot, |
Items
95 new items were added in the expansion: 19 activated items and 76 passive items.
Activated Collectibles
Passive Collectibles
Trinkets
29 new trinkets were added in the expansion.
Pickups
Pickups & Chests
| Name | Icon | Description |
|---|---|---|
| Gold Heart | Gold Hearts are the rarest variation of a heart. They are unlocked by completing the challenge Template:AfterbirthXXXXXXXXL. They always appear as full hearts and, once picked up, drop money the next time Isaac loses a Heart. A Golden Heart appends to the end of the health bar, surrounding it in a golden glow. | |
| Lucky Penny | A Lucky Penny increases luck by 1 when picked up. Unlocked by donating 1 coin to the Greed Machine. Bumbo and Bum Friend are unable to pick up Lucky Pennies; they instead hover over them attempting to pick them up. Humbling Bundle does not double lucky pennies. | |
| Sticky Nickel | A Nickel that will flip upside-down when Isaac tries to collect it. Afterwards, it will get stuck on the ground, unable to be picked up unless blasted off the ground with an explosion. Unlocked by completing Boss Rush with Keeper. It won't reduce the spawn rate of regular Nickels: rather, Pennies have an additional chance to become Sticky Nickels. | |
| Gold Bombs | Gold bombs will not add to the player's bomb count, but when picked up, they will give the player unlimited bombs for the duration of the current floor, similarly to Golden Keys. They are unlocked by completing the challenge Blue Bomber. | |
| Angel Chests | Angel Chests are similar in appearance to Gold Chests, except they glow bright blue instead of gold, like a soul heart. They require one key to unlock, but can be reopened a random amount of times, each time requiring another key. They can be found in Angel rooms and rarely in a normal room. Their loot is similar to Golden Chests, but they can also drop nothing upon opening. If they contain nothing or an item, they will no longer be able to be reopened. | |
| Spike Chests | File:SpikeChest.png | Spike Chests are purple colored chests with spikes protruding from them that will deal damage to Isaac upon opening (unless he has the Holy Mantle active, which nullifies the damage, or if found in The Chest, where they are free to open). They can be rarely found upon completing a room or in greed mode shops. Their loot is similar to Brown Chests. Unlike other chests, they do not appear on the minimap. |
| Mystery Sack | The Mystery Sack will spawn 1-4 pickups upon touching it. Sack Head greatly increases the chances of finding sacks. |
Pills
| Pill | Effect |
Makes Isaac take a full heart of damage from all sources for the current room. Unlocked by completing Challenge #24: PAY TO PLAY. | |
| Friends Till The End! | Spawns three Blue Flies. |
| Infested! | Destroys all poop in the room and spawns a single Blue Spider under Isaac and on each destroyed poop. |
| Infested? | Spawns Blue Spiders equal to the number of enemies in the room. If there are no enemies in the room, spawns 1-3 Blue Spiders. |
| One Makes You Small | Decreases Isaac's size and increases the pitch of his voice. This effect decreases the size of Isaac's hitbox. |
| One Makes You Larger | Increases Isaac's size and decreases the pitch of his voice. This effect does not increase the size of Isaac's hitbox. |
Gives The Wafer effect while in the room. Unlocked by completing Challenge #24: PAY TO PLAY. | |
| Power Pill | Activates an effect similar to The Gamekid. |
For a short time, poop spawns wherever Isaac moves, like Explosive Diarrhea but with poop. A higher move speed means you can touch more tiles in the same time. A pun on laxatives. Unlocked by completing Challenge #25: Have a Heart. | |
| Retro Vision | Briefly pixelates the screen 3 times over 30 seconds. |
Gives the Curse of the Maze effect for the remainder of the floor. The effect can stack with other curses. If no other curses are active for the floor, Curse of the Maze will appear under the level name when TAB is held. This effect cannot be negated by Black Candle. Unlocked by completing Challenge #25: Have a Heart. |
Cards & Runes
Template:? CardTemplate:Get out of Jail Free CardTemplate:Emergency ContactTemplate:Dice Shard| Name | ID | Icon | Message | Effect |
|---|
| Rune | ID | Icon | Message | Unlocked by completing | Effect
Template:Blank Rune |
|---|
Transformations
Template:Bob's Rotten HeadTemplate:Bob's BrainTemplate:Bob's CurseTemplate:IpecacTemplate:Brother BobbyTemplate:Harlequin BabyTemplate:Headless BabyTemplate:Little StevenTemplate:Mongo BabyTemplate:Rotten BabyTemplate:Sister MaggyTemplate:God's FleshTemplate:Mini MushTemplate:Magic MushroomTemplate:Odd Mushroom (Thin)Template:Odd Mushroom (Large)Template:1up!Template:Blue CapTemplate:The NailTemplate:The MarkTemplate:The PactTemplate:PentagramTemplate:Spirit Of The NightTemplate:Maw Of The VoidTemplate:AbaddonTemplate:BrimstoneTemplate:Flush!Template:The PoopTemplate:E ColiTemplate:The BibleTemplate:Dead DoveTemplate:Guardian AngelTemplate:Holy GrailTemplate:Holy MantleTemplate:MitreTemplate:RosaryTemplate:Sworn ProtectorTemplate:The HaloTemplate:Experimental TreatmentTemplate:Growth HormonesTemplate:Roid RageTemplate:Speed BallTemplate:SynthoilTemplate:The VirusTemplate:Mom's Bottle Of PillsTemplate:Mom's BraTemplate:Mom's PadTemplate:Mom's WigTemplate:Mom's EyeTemplate:Mom's PurseTemplate:Mom's ContactsTemplate:Mom's KnifeTemplate:Mom's HeelsTemplate:Mom's EyeshadowTemplate:Mom's PerfumeTemplate:Mom's KeyTemplate:Mom's LipstickTemplate:Mom's UnderwearTemplate:Mom's Coin PurseTemplate:Mom's PearlsTemplate:Bum FriendTemplate:Dark BumTemplate:Key Bum| Transformation | Appearance | Transformation effect | Item | Icon | Item effect | Recharge |
|---|---|---|---|---|---|---|
| Bob | File:Bob Transformation.png | |||||
| Conjoined | File:Baby Transformation.png | |||||
| Fun Guy | File:Mushroom Transformation.png |
|
||||
| Leviathan | File:Evil Angel Transformation.png |
|
||||
| Oh Crap | File:Poop Transformation.png | |||||
| Seraphim | File:Angel Transformation.png |
|
||||
| Spun | File:Drugs Transformation.png | |||||
| Yes, Mother? | File:Mom Transformation.png |
|
||||
| Super Bum | File:Super Bum.png Image depicts the familiar. This transformation does not alter Isaac's appearance. |
| ||||
NPCs
Monsters
Many new monsters were added in the expansion. Additionally, several new champion types were added.
Template:Dart FlyTemplate:Swarm FlyTemplate:Drowned Boom FlyTemplate:Corn DipTemplate:Dank SquirtTemplate:RoundyTemplate:UlcerTemplate:Drowned HiveTemplate:DukieTemplate:Flaming GaperTemplate:CyclopiaTemplate:Black BonyTemplate:Dank Death's HeadTemplate:Flesh Death's HeadTemplate:Fat BatTemplate:Red GhostTemplate:Flaming FattyTemplate:Conjoined FattyTemplate:Blue Conjoined FattyTemplate:Dank GlobinTemplate:Black GlobinTemplate:Black Globin's BodyTemplate:Bone KnightTemplate:Mega ClottyTemplate:Mom's Dead HandTemplate:Drowned ChargerTemplate:Scarred Para-BiteTemplate:Scarred GutsTemplate:Scarred Double VisTemplate:MeatballTemplate:ImpTemplate:Greed GaperTemplate:Blue GaperTemplate:Blue BoilTemplate:Hush Fly| Monster | Description |
|---|
Bosses
Several new bosses were added in the expansion. Additionally, many bosses received new champion variants.
 |
 |
 |
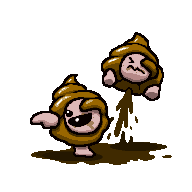 |
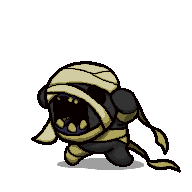
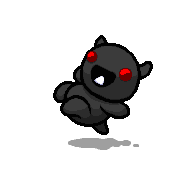
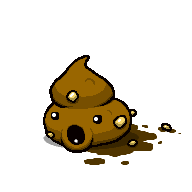
| Rag Man | Little Horn | Dangle | Turdlings |
 |
 |
 |
 |
| The Frail | The Stain | The Forsaken | Brownie |
 |
 |
| Hush | Ultra Greed |
Beggars
Bomb Bums are extremely rare, and ask for bombs. Each bomb donated has a chance to have him drop 1-2 bomb pickups or an item from the Bomb Bum Item Pool. After spawning a pedestal item, the Bomb Bum will disappear and can no longer be donated to.
Environment
Chapters
| File:Burning Basement.png | File:Flooded Caves.png |
| Burning Basement | Flooded Caves |

|
File:Scarred Womb.png |
| Dank Depths | Scarred Womb |
| File:Blue Womb.png | |
| ??? (Blue Womb) | |
Challenges
| Name | Conditions | Goal | Unlocked by | Unlocks |
|---|---|---|---|---|
| 21. XXXXXXXXL | Every floor is the size of an XL Womb floor, but does not combine the floors of each chapter.
Treasure rooms available. Shops available. |
Mom's Heart | Killing Mom for the first time | Gold Heart |
| 22. SPEED! | Everything is sped up like the Broken Watch effect. 16 minute time limit.
Treasure rooms available. Shops available. |
Mom's Heart | Killing Mom for the first time | Get out of Jail Free Card |
| 23. Blue Bomber | This challenge is done as ???. Starts with: Pyromaniac, Kamikaze!, Mr. Mega, and Brother Bobby.
Blindfolded (cannot use tears). No treasure rooms. Shops available. |
Satan | Unlocking ???, Mr. Mega and It Lives! | Gold Bomb |
| 24. PAY TO PLAY | Starts with: Sack of Pennies, Money = Power, 50 cents.
Every door costs 1 cent to enter. Isaac drops money when hit. Isaac dies if you run out of money. No treasure rooms. Shops available. |
Isaac | Unlocking Sack of Pennies and It Lives! | 2 new Pills
(Percs! and Addicted!) |
| 25. Have a Heart | Starts with: Charm of the Vampire.
Starts with 12 red heart containers, only 1 of which is filled. Pennies drop instead of red hearts. Many items that restore red hearts have no effect. Treasure rooms available. Shops available. |
Mom's Heart | Killing Mom for the first time | 2 new Pills
(Re-Lax and ???) |
| 26. I RULE! | Starts with: Key Piece 1, Key Piece 2, Trinity Shield, Mom's Knife, The Ladder, The Boomerang.
No treasure rooms. Shops available. |
Mega Satan | Killing ??? or The Lamb for the first time, and unlocking Mom's Knife. | Poker Chip |
| 27. BRAINS! | This challenge is done as ???. Starts with: 3 Bob's Brains, Thunder Thighs, The Poop.
Blindfolded (cannot use tears). No treasure rooms. Shops available. |
??? | Unlocking The Polaroid | Stud Finder |
| 28. PRIDE DAY! | Starts with: 3 Dollar Bill, Rainbow Baby, Rainbow Worm.
Cannot drop or replace Rainbow Worm. No treasure rooms. Shops available. |
Mom's Heart | Killing Mom for the first time | D8 |
| 29. Onan's Streak | This challenge is done as Judas. Starts with: Chocolate Milk.
Missing a shot deals damage to Judas. Treasure rooms available. Shops available. |
Isaac | Unlocking Judas | Kidney Stone |
| 30. The Guardian | Starts with: Holy Grail, Punching Bag, Isaac's Heart, Spear of Destiny.
Isaac's Heart will follow the Punching Bag instead of Isaac. Blindfolded (cannot use tears). No treasure rooms. Shops available. |
Mom's Heart | Killing Mom for the first time | Blank Rune |
Changes
Items
Activated Collectibles
Increases chance for a Devil/Angel Room Door to open by 17.5%.
Passive Collectibles
- File:20 20 Afterbirth Icon.png Its icon is white-tinted.
- The type of randomized tear changes every 2-3 seconds. The item appears to select two tear effects at once, perhaps staggering the times at which each of those effects change.
- If a run is quit, and then continued, 3 Dollar Bill will keep tear effects for the current room.
- Abel shoots tears towards Isaac regardless of which direction Isaac is shooting.
- Ball Of Bandages
- Ball of Bandages blocks enemy shots.
- Bob's Brain is fired directly from where it is located in the chain of familiars behind Isaac, making aiming it slightly more difficult.
- Can drop a Gold Bomb.
- Can drop a Gold Bomb.
Template:FindInteractions
Pickups
Bombs
- Troll Bombs are now given a random amount of time before exploding. Before that they always exploded at a fixed time. This means that if two Troll Bombs spawn at the exact same time right next to each other, there's a high chance one Troll Bomb will blow up before the other, sending that Troll Bomb sliding outwards a bit before exploding.
NPCs
Monsters
- They only leave behind bones when killed.
Environment
Rooms
- Double Trouble boss rooms can now contain 2 bosses of different types. Additionally, they can appear as early as Chapter 1.
- Hush is always fought in a 2x2 room and Ultra Greed is fought in a double-sized one (2x1).
- An Arcade can contain a Bed, a Key Master and 3 hanging dead Shopkeepers.
- Possible rewards found in the room include:
- 2 Angel Chests
- 1 Eternal Heart, and 4 Soul Hearts behind Key Blocks
- Template:GreedMode 6 coins
- Template:GreedMode 2 Soul Hearts and 1 Gold Heart.
- Urns might spawn in the room.
- Killing Key Masters and Shell Game Beggars no longer applies the 25% bonus.
- Donating to a Normal Beggar until it pays out with an item on the current floor applies a 10% bonus instead of 25%.
- Donating to a Devil Beggar until it pays out with an item on the current floor applies a 10% bonus instead of 25%.
- If this coin flip succeeds, a Devil Room will be generated regardless of the above coin flips.
- "You feel blessed!" fortune in the Sacrifice Room of the current floor applies a bonus:
- If the "You feel blessed!" fortune appeared on the 3rd sacrifice, the chance will be 15%.
- If the "You feel blessed!" fortune appeared on the 5th sacrifice, the chance will be 50%.
- If both "You feel blessed!" fortunes appeared, the chance will be 65%.
- Angel Rooms that spawn after Isaac defeats Mom's Heart or It Lives will be normal Angel Rooms with items or pickups.
- A troll bomb can sometimes appear behind the Angel Statue, blowing it up. If the Angel fights have been unlocked, this will begin the boss fight if the player is not careful or quick enough to move the bomb.
- The clean bedroom occasionally has two clean beds instead of one.
- The trapdoor in a dirty bedroom has a chance to lead to a Crawl Space.
- Occasionally, one Rag Man will spawn inside the dirty bedroom.
- There is a chance that there will only be 2 items to choose from. Additionally, items may be trapped behind rocks or spikes. Items may appear in the corners of the room instead of the center.
- All 15 waves are randomized. Each wave spawns two random bosses from the list. Each boss can only appear once per Boss Rush.
- Brownie, Dangle, Dark One, Dingle, 3x Gurglings, Little Horn, Mega Fatty, Mega Maw, Polycephalus, Rag Man, The Adversary, The Cage, The Forsaken, The Frail, The Gate, The Haunt, The Stain, and 3x Turdlings can appear in the Boss Rush.
- The angels Uriel and Gabriel can also appear.
- New layouts:
- If a sack spawns for whatever reason, picking it up will start the Boss Rush. The player can still pick up one of the pedestal items.
- Black Market can no longer be accessed in The Chest and The Dark Room, and therefore cannot be used to collect more items.
Other
- When not having red hearts in Devil Room, the price of items switches to soul hearts.
- Krampus has a new attack pattern.
- The Lost is now unlocked by dying in a Sacrifice Room while holding Missing Poster.
- Sacrifice rooms were reworked to give more useful rewards.
Gallery

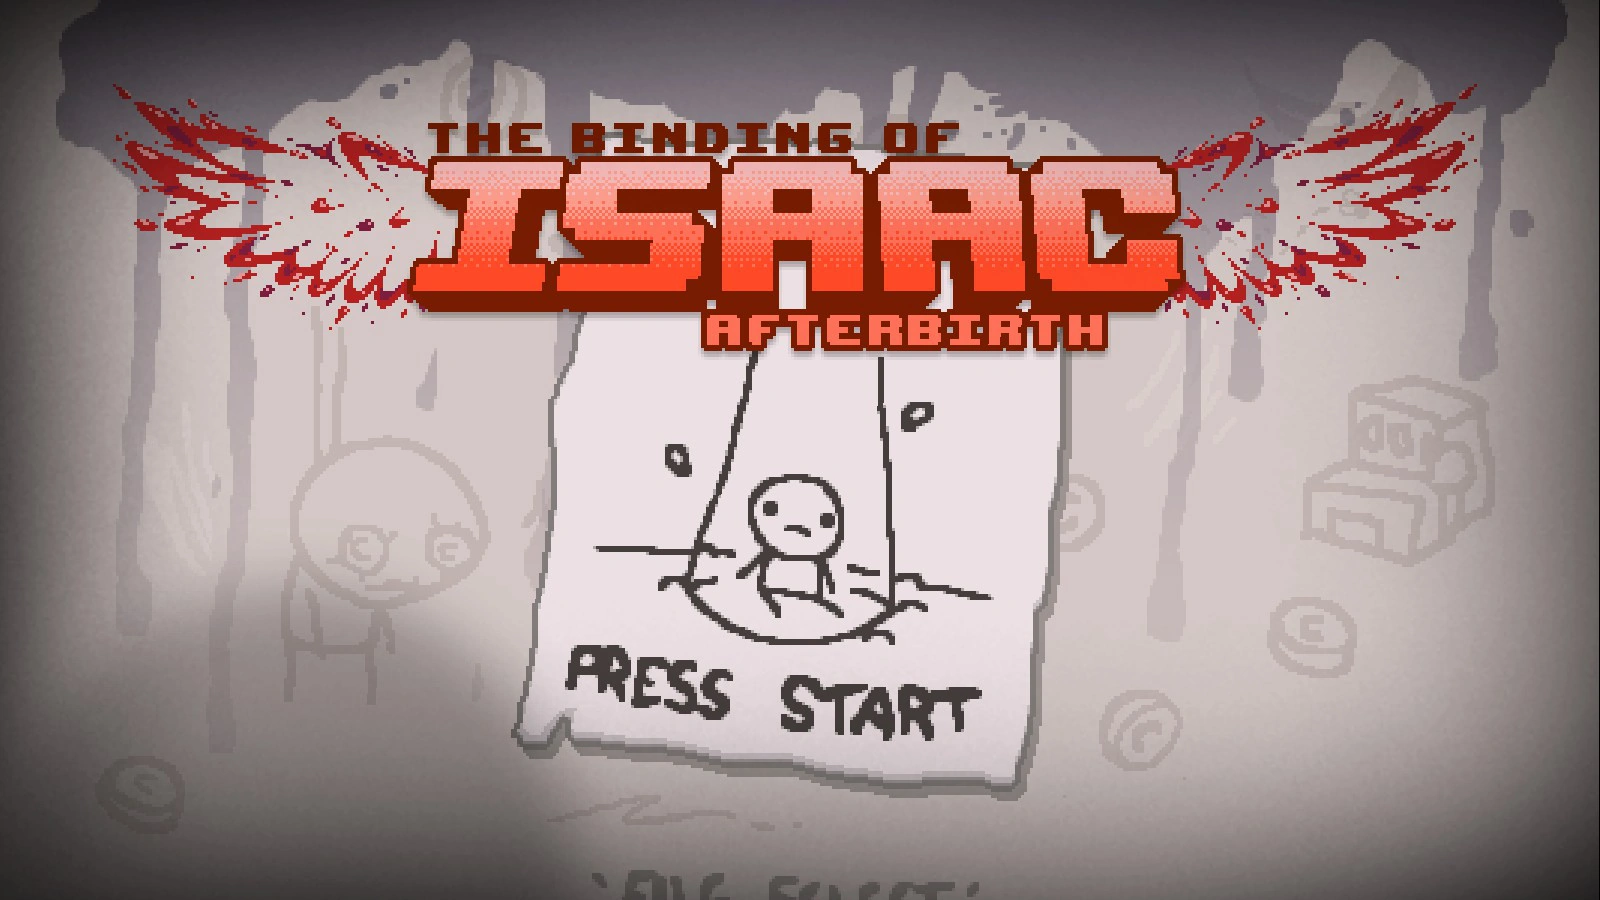
The title screen of The Binding of Isaac: Afterbirth.
Trivia
- Afterbirth is the placenta and fetal membranes discharged from the uterus after the birth of offspring, which might be why the title screen is bloody.
Template:MasterNav