Unlock Method Use Red Key (etc.) to open the hidden closet in Home as Lazarus
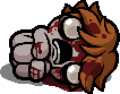
Tainted Lazarus is a character added in The Binding of Isaac: Repentance. He is the alternate version of Lazarus, playable in two different states: Tainted Lazarus and Dead Tainted Lazarus. Tainted Lazarus has ragged hair and is covered in dirt while Dead Tainted Lazarus has pale white skin, glassy eyes, and is covered in blood. Horizontal scars are noticeable on the wrists of both forms of Tainted Lazarus. Tainted Lazarus is unlocked by reaching Home and using the Red Key, Cracked Key, or Soul of Cain to access a special room in one of the walls while playing as Lazarus.
Tainted Lazarus starts with 3 Red Hearts, whereas Dead Tainted Lazarus starts with 2 Soul Hearts. Tainted Lazarus begins with fairly low range while Dead Tainted Lazarus has a 1.5x damage multiplier, slightly lower tears and speed, and -2 luck. Each character has separate items, attributes, trinkets, and consumables, similar to Jacob and Esau except each character is only played individually. Whenever a room is cleared, including each wave of multi-wave rooms like in Greed Mode and Challenge Rooms, Tainted Lazarus swaps between the two forms, essentially requiring the player to play each character on every other room. Tainted Lazarus starts with Flip in his consumable slot, which can be used to swap state immediately.
Correctly managing the charges of Flip to get items for both forms of Tainted Lazarus from Treasure Rooms, Devil deals, and Angel Rooms is very important, as grabbing every flipped item effectively doubles the power of Tainted Lazarus.
The only way to access the ghostly form of an item generated by Flip is by using it to switch forms. Re-entering the room with a different form of Tainted Lazarus does not flip the item pedestals. Making Tainted Lazarus switch form inside the room without using Flip (for example, after fighting an angel in the Angel room), does not flip the item pedestals.
Flipping between forms will effectively act as a room transition for certain items; in other words, flipping back in the same room will reset those items as if a new room had been entered.
Items that grant extra lives (Dead Cat, 1up!, Lazarus' Rags, etc.) only affect the one who picks them up. If Dead Lazarus collects an extra life item, it can only activate when Dead Lazarus is the active character, and vice versa.
If one form of Tainted Lazarus is reduced to zero hearts while being in the transitioning phase of Flip, he will remain alive as the other form, but die as soon as he switches back. There is nothing the other form can do to prevent that death, unless you're playing coop and being revived after a boss death; In greedier/greed mode you will be revived if another player kills the first boss wave fought while in XL floors it is the 2nd boss killed that allows for a player revival while you are in the T Lazarus form that is in a baby ghost familiar form so it's recommended to plan rooms accordingly.
Quest items are counted as both characters having them.
The Polaroid and The Negative work on both Living Tainted Lazarus and Dead Tainted Lazarus, regardless of which picked them up.
Key Piece 1 and Key Piece 2 will grant their Angel Room bonus to both characters, and will combine to a whole key even if the pieces are not on the same character.
Knife Piece 1 and Knife Piece 2 will combine to a whole knife usable by both characters regardless of who has which piece.
Dogma's flight and stat bonuses are applied to both characters, but healing and Holy Mantle apply only to the active character when receiving it. Since forms change after defeating Dogma, and the item is bestowed after the cutscene, this means that the form that was not active to defeat Dogma will receive the healing and mantle effect.
Temporary buffs such as Razor Blade disappear when you switch from one character to the other. This is especially noticeable in Greed Mode.
However, room buffs like I'm Drowsy, Era Walk, and XI - Strength? will stay in effect between flips. Any stat bonuses given are lost.
Only the character that picks up an activated item first gets the progress for related transformations, so the player needs to be aware of what character needs the transformation progress.
Tainted Lazarus takes a lot of micromanagement compared to most other characters. It can be difficult to accomplish simple tasks due to the forced switching between forms and Flip's long charge time. Try to stay ahead of this, and pay close attention to what form is active and when they will shift. Something such as collecting an item from a Treasure Room or Curse Room can potentially go wrong if enemies happen to be inside, as when they are defeated, Tainted Lazarus will switch form. This can lead to an undesired item on one form, or a forced use of Flip.
If an Angel Room has an item you would prefer on one form over the other, and Flip is not currently charged, using a bomb on the Angel Statue and fighting the Angel that spawns will make Tainted Lazarus flip upon the fight's completion. This does not flip the item, however.
Challenge Rooms and Boss Rush will flip Tainted Lazarus every wave.
Try your best to balance the forms' stats in a way that prevents runs from feeling "lopsided". An easy trap to end up in is one form feeling unstoppable, but needing to struggle through every other room with the other.
Try to boost Living Tainted Lazarus's range and damage. Dead Tainted Lazarus already has a large damage multiplier, so it's less necessary to take large damage increasing items in this form.
Active items will recharge even when the other form is active. For example, it will take 3 rooms to charge an active item that requires 3 bars to charge, despite the fact that the flipped form doesn't have the same active item. This can be very powerful, as it effectively allows him to double the active item slots.
Tainted Lazarus's greatest strength lies in his precise control over his health bars. Using Flip strategically during boss fights is a key to victory. For example:
If one form runs out of Soul Hearts, but the other still has some, using Flip can help prevent loss of Devil Room or Angel Room chance.
Despite only being at half of his firepower at a time, Tainted Lazarus can utilize his potentially massive health pool to clutch out unlikely victories against late game bosses. If damaged down to lethal health, using Flip can extend the fight dramatically. This can be further improved by having one or both forms have healing options such as XIX - The Sun, Full Health Pills, or an Active Item like Guppy's Paw.
Due to this strength, it may be advised to try for Angel Rooms over Devil Rooms, as many Angel Room items add health rather than take it away.
Conversely, Devil deals are also incredibly lucrative for Tainted Lazarus. Only one form has to pay for the item, while the other gets the flipped item for free. This can be helpful if one form is significantly more powerful than the other, as that form can pay for the devil deals so the weaker form can get them for free. However, this does require the weaker form to be the one to kill the floor's boss, so keep that in mind.
If one form of Tainted Lazarus has flight and a room is cleared while above usually inaccessible land, Tainted Lazarus will gain a temporary flight for the current room.
Greed Mode, and especially Greedier Mode, can be very difficult for Tainted Lazarus for several reasons:
Each completed wave swaps from one form of Tainted Lazarus to the other, which locks him in the flip animation for about a second. He cannot fire tears while in this animation. Considering that waves in the later floors of Greed Mode can last 3 seconds or shorter, this leaves Tainted Lazarus unable to attack enemies for a significant amount of time.
Additionally, temporary buffs that are usually powerful in Greed Mode, such as The Book of Belial or XI - Strength, will disappear when you switch from one character to the other, meaning you can only use them for a single wave.
It may be best to favor one form of Tainted Lazarus over the other, as only one form has to fight Ultra Greed and Ultra Greedier. Defeating Ultra Greed does not cause Tainted Lazarus to flip characters. The room before Ultra Greed also doesn't cause the forms to flip. This tactic of favoring one character works extremely well, considering that the weaker character doesn't need to defeat the enemies within a wave, since just avoiding being hit for a few seconds until the next wave starts gives control back to the more powerful character.
Some items and trinkets with the lazarussharedglobal item tag are now shared between both forms. This includes items that map parts of the floor such as The Compass, items that increase devil/angel deal chance such as Black Candle, and items/trinkets that spawn new or altered rooms on each floor such as Voodoo Head. Items that grant a shared effect and a stat boost (such as Pentagram, which grants a damage increase and increases devil deal chance), will not transfer the stat increases between forms.
Items that affect room clear awards (for example Contract From Below) work only when the character holding the item appears after clearing the room.
Steam Sale is not shared between the two. Consider giving it to the least powerful one, especially in Greed Mode.
During Dogma + The Beast fight, flips happen between each boss. For example, if entering Home with Live Lazarus, Dogma will be fought with Live Lazarus, then Dead Lazarus will fight Ultra Famine, Live Lazarus will fight Ultra Pestilence and so on. Then, Dead Lazarus will fight the Beast. Flip does not activate between the different phases of the bosses.
While playing true coop, Tainted Lazarus will still swap between forms while dead; if one of Tainted Lazarus forms dies while the other is alive, he will alternate between being a ghost baby who can’t interact with items or gain hearts and a normal character who can.
To be able to revive the dead version of Tainted Lazarus, the player must enter the boss fight while being on the alive form of the character, as the flip takes place BEFORE the revive process, hence the ghost baby will be resurrected.
Item Interactions[ | ]
Birthright: Whichever version of Tainted Lazarus is not active will be available as a "ghost", moving alongside the current Tainted Lazarus like Esau, able to fire tears but immune to taking damage. Both characters receive the Birthright effect when one character collects it.
Some effects from the inactive form's items will apply to the active form now as well. For example, Damocles can fall and kill the player.
If a one-room effect is triggered before a flip, the effect will be retained by the ghost for the remaining of the room. e.g if one form uses The Nail and then finishes the room, it will become the ghost but will still be able to crush obstacles.
Beware that Birthright can be detrimental on some builds. For instance, if one character has Dr. Fetus and Pyromaniac, the other character will still be damaged by the ghost's bombs.
If one form has Lachryphagy, the other form's tears will also be absorbed but the tear will not grow.
Another notable downside is Boss Challenge Room requiring both forms to have 1 HP to enter, instead of only the active one.
Only the form that is currently active can cross The Ladder when bridging a gap.
Buddy in a Box: The familiar changes appearance and tear effects each time the character who has Buddy in a Box is flipped to.
Crown Of Light: In Greed Mode, once damage is taken, and flip is used twice, the Crown of Light will appear visually to be active, but its effects are still disabled.
D4/D8/D100: Rerolls only apply to the form holding the die.
Genesis: Resets both forms' items and spawns items based on the total amount of items from both characters. Flip can be used infinitely while inside the room.
Filigree Feather: Defeated angel bosses drop angel room items only for the form carrying Filigree Feather.
Glitched Crown: Only works while the form holding it is active when an item spawns.
Kidney Stone: After switching in form with Kidney Stone, the effect of item will activate immediately.
Lemegeton: Losing Lemegeton wisps as the character who is not holding it will cause the wisps to disappear but their effects will remain.
Lost Soul: If the Lost Soul dies, it will not respawn by switching characters. If it didn't die, going to the next floor with the character that doesn't have Lost Soul will still grant its rewards once the character is active again.
Luna: The beams of light are available for either form to attain.
The Stairway: Will work while either form is active while going down a floor.
Star of Bethlehem: The star only moves while the character holding it is active, effectively making it take twice as long to reach the boss room. Additionally, if that character is inactive when entering the floor, the star will not spawn until that character becomes active, in which case it spawns in the center of the current room.
There's Options: Will still grant two boss items, regardless of who fought the boss.
TMTRAINER: Only generates glitched items if the form holding it is the one to see the item first. This can allow the player to get normal, unglitched items onto the form holding TMTRAINER, and glitched items onto the form without it if desired.
Urn of Souls: Souls cannot be collected by an inactive character. This means that as soon as the room is cleared, all souls still in the air are lost even after you Flip.
The Battery: Any extra charges Flip acquires will not be lost when switching to the form without The Battery, allowing you to build up an extra activation, although at a slower than normal pace.
Binge Eater: In a Devil Room, Tainted Lazarus is effectively able to give items to his inactive form for free by picking up a food item. This will remove one heart container, and then instantly restore it. The mirrored Devil items will remain however, meaning he can use Flip and pick them up as his alternate form for no cost.
Book of the Dead: Bone orbitals and charmed Bonies spawned by Book of The Dead carry over through transforming and benefit either form of Tainted Lazarus.
Items like The Body, Cancer, and other drastic health increases allow Tainted Lazarus to tank large amounts of damage in longer boss fights if spread between forms.
Wisps created by Book of Virtues will remain after flipping between forms, and flipping to the form of Tainted Lazarus that is not holding the book will create a Flip wisp, even if Flip was not activated manually.
Large damage increases such as Cricket's Head or Synthoil are useful to get onto Tainted Lazarus's living form early to make up for his damage deficit.
Diplopia and Crooked Penny allow for potential duplications of strong items to get on both forms. Though keep in mind Devil Rooms or Angel Rooms would likely require the form holding them to be active upon entry. Locate the boss room, and if necessary, clear rooms until Flip is charged and you are playing as the form NOT holding Diplopia or Crooked Penny. Upon defeating the boss, Tainted Lazarus will Flip automatically, allowing the duplication of Devil or Angel Items, followed by flipping and taking the same item on the other form.
Having one form hold Guppy's Paw with a medium to large pool of heart containers can extend the potential time before needing to flip, extending your health bars even further.
Esau Jr.'s body granted by the item has a stronger damage, additional health and flight. The item can also be given to the other Lazarus by trading it with another active item on a pedestal, performing a flip OUTSIDE the room or a room clearing flip, and going back to where you left it.
Live Lazarus's Esau has 4 black hearts on first use, while dead form has 3 red hearts. Both can gain red heart containers.
Esau-Lazarus's form is permanent, even if the item is left behind, allowing for a straight-up character upgrade. The only way to change back is with the item itself.
Be careful if the item is acquired late game. The item randomization may throw off the rhythm established by that point, especially if it includes more risky items like Ipecac without any means of mitigation, making it nearly impossible to play with. It's highly recommended to acquire as close to the start of a new run as possible instead. Since it only has one charge though, switching back to Lazarus shouldn't be difficult in most situations.
Jumper Cables can allow for more use of one form's Active Item, or just more use of Flip.
Red Stew's damage bonus does not decrease when the form holding it is inactive.
Star of Bethlehem can be a good way to prevent one form from lagging behind the other power-wise.
Offensive Active Items that charge on a timer, especially Sharp Straw and Glass Cannon, can make up tremendously for one form that happens to be lagging behind. The Sharp Straw in particular, due to how it calculates damage, can make the weaker form much more offensively viable during end game boss fights.
Old Capacitor is a great trinket to find. This will effectively turn Flip into a 12 charge item (due to only being active half of the time), however the increased spawning of Lil Batteries can allow more micromanagement to take place when a floor is finished, flipping between forms as needed.
Watch Battery is a good alternative, or even supplementary trinket to keep on the other form, as it increases chances of finding Lil Batteries as well.
Low charge Active Items with simple, effective uses, such as Shoop da Whoop!, White Pony, or Spider Butt can be recharged within one large room, and can supplement the lack of power Tainted Lazarus is prone to.
Quints is a great choice in Greed mode, because the 5-familiar limit will reset every time Lazarus flips, while the familiars themselves stay. This allows the player to amass a very large amount of familiars. Birthright ruins this synergy though.
Bad Items[ | ]
While not exactly a bad choice, extra lives like Dead Cat or 1up! require a bit more thought to get use out of, due to only reviving the form holding it. If a 1up! is found, try to have the form with more heart containers pick it up to get the most use from it.
Blood Puppy: If it rages, the rage state is retained, which can cause unavoidable damage from it spawning directly on the player when switching forms.
In Greed and Greedier Mode, Sprinkler will disappear when a new wave spawns.
Death's List: Bonus reward cannot be granted unless Tainted Lazarus has Birthright or both his form have a copy of Death's List.
4.5 Volt: While the two versions of Tainted Lazarus normally charge both their active items at the same time, 4.5 Volt will only charge when the state that holds it deals damage, and will prevent it from being charged when the other clears a room. This makes 4.5 Volt significantly worse while playing Tainted Lazarus.
The achievement for unlocking Tainted Lazarus is called "The Enigma", a possible title for the character.
An "enigma" is commonly referred to as "a person or thing that is mysterious, puzzling, or difficult to understand".
If the console command "restart 38" is put into the console, it is possible to start a run as Dead Tainted Lazarus without having to clear a room, however, you will not be able to change into Tainted Lazarus, whether that is from using Flip or from clearing a room.
Tainted Lazarus' wrists appear to be cut, suggesting self-harm or possibly even suicide.
This could be referencing the common strategy of intentionally dying as Lazarus to respawn as his stronger form, Lazarus Risen.
He also constantly leaves behind small pools of blood as he walks, Dead Tainted Lazarus even more so.
If the floor is wet, Tainted Lazarus' inactive form will be in the reflection of the water instead of the active one.
Tainted Lazarus unlocks XX - Judgement? which could be read as self doubt because of how hard is Tainted Lazarus to micromanage unlike most other characters, but also as the reversal of the Judgement card's meaning on rebirth and second chances, as he no longer has his extra life and Lazarus Risen is now refered as Dead Lazarus instead.
Furthermore, Judgement displays the awakening of the dead in Revelation 20:12-14. His zombified appearance can be seen as rejected from salvation.
In Christian theology, suicide is seen as rejecting God's gift of life, a sinful act which forfeits salvation.
Tainted Lazarus may have been inspired by the character of Adam from the Community Remix mod of Flash Isaac. Like Tainted Lazarus, Adam switched forms with one side having higher speed and tears and the other having higher damage.
Tainted Lazarus may also be inspired by Schrödinger's cat, a thought experiment in quantum mechanics about a hypothetical cat who can be considered simultaneously alive and dead. His Birthright quote, "Superposition", is also a common term used in quantum mechanics.
Gallery[ | ]
Tainted Lazarus's transition screen portrait.
Dead Tainted Lazarus's transition screen portrait.
Tainted Lazarus's locked character icon, depicting a closet door inside of another opened closet door.
Bugs[ | ]
Bug!
Exiting the run during the second or third wave of a Challenge Room will forcibly flip Tainted Lazarus when the run is continued.
Bug!
If Tainted Lazarus uses Decap Attack and switches forms without recovering his head, upon switching back again that form's tears will appear from a point seperate from his body, until Decap Attack is used again.
Bug!
When fighting Rotgut, whichever form was used for the first phase will temporarily become invisible after killing the third phase and Rotgut's death animation plays. This is purely visual.
Bug!
If the player teleports out during an active Greed Mode wave, going back to the room will prevent the player from switching forms during waves until he reaches the wave that he was previously on. This is not the case if the waves were completed before the timer has ended.
Bug!
Doing a RERUN when Birthright was obtained will spawn an additional alternate form of the character.
Bug!
When Tainted Lazarus has Birthright, his inactive form, despite being immune to external damage, can still be damaged by poisonous gas from destroying mushrooms and by The Pile's spike attack.
The inactive form can also be damaged if it has Isaac's Heart and Birthright.
Bug!
When Tainted Lazarus uses flip while having Birthright through Lemegeton, the now active form won't be able to pickup the item until the room is re-entered
Bug!
One form of Tainted Lazarus may appear to be stuck in ghost form after leaving the Mirrored World. This affects appearance only.
Bug!
If Tainted Lazarus teleports (Mausoleum/Gehenna's teleporters or Stitches) at the same time as the room clears, he will NOT flip between forms.
Bug!
The harbingers from item 7 Seals, can duplicate themself on hit for the current room when you're playing Tainted Lazarus.
Bug!
If at least one character has Spear Of Destiny or Trinity Shield, swapping to the other character causes these items to leave a stationary copy of themselves until Isaac leaves the room. The stationary spear is only a visual bug with no collision while the stationary shield still blocks tears.


 Flip to get items for both forms of Tainted Lazarus from